
Instructions and images for the construction of our Frugal horn XL kits
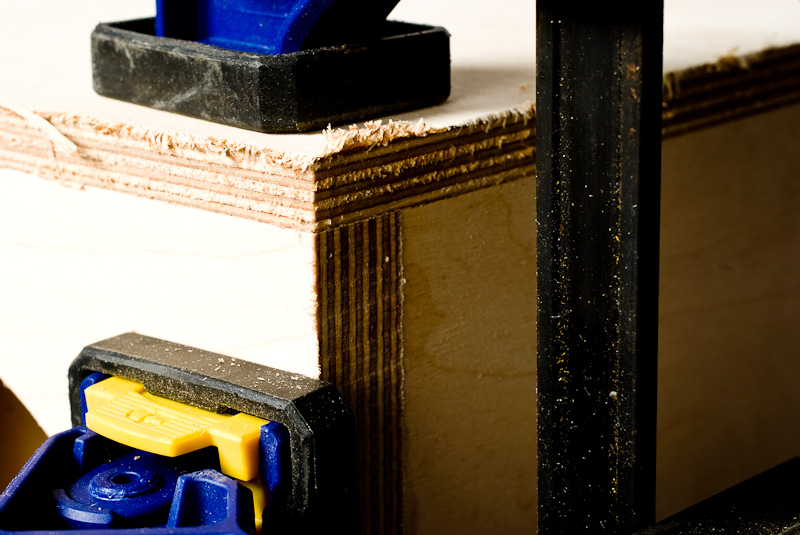
The first thing you will need to do is find a flat area to work and spread out some paper to protect your surface from glue drips and scratches. Birch is quite soft and prone to getting scratched until you wax, oil or veneer it. Make sure your work area is clear of bits, have a brush to hand and sweep the bits away at every opportunity.
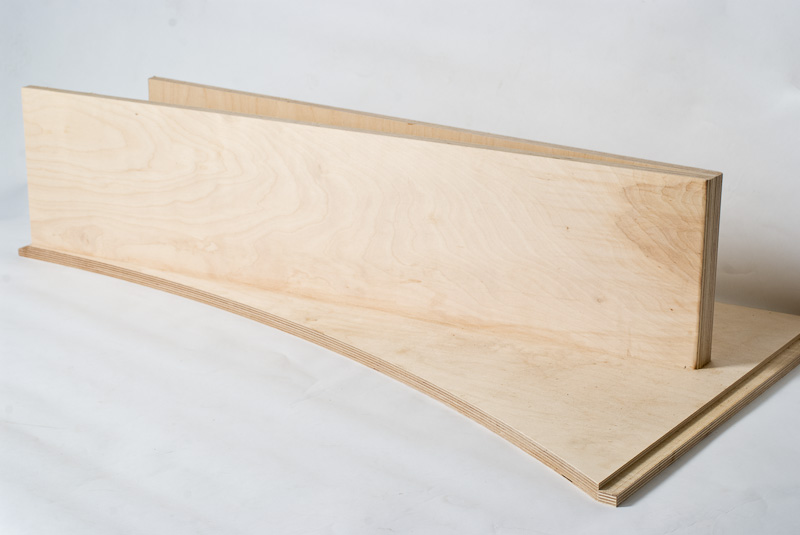
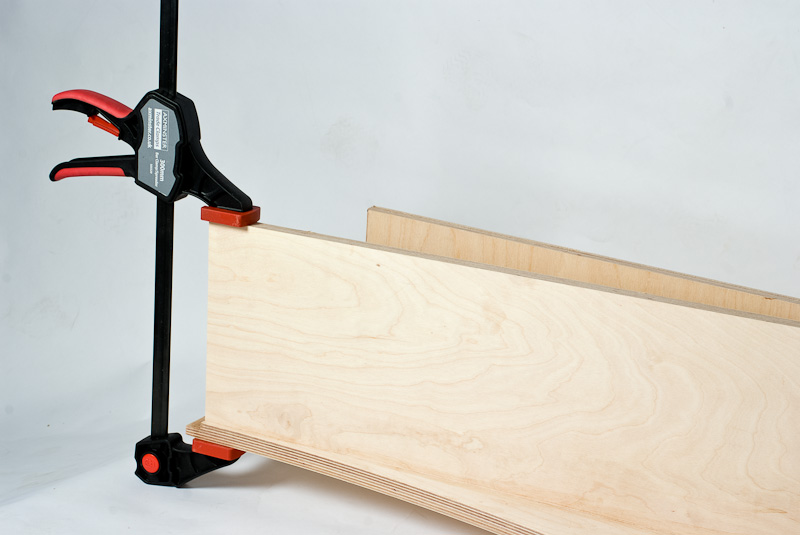
Place one of the rebated side panels onto the work surface and add glue to the central slots and push the inside and back panels into these slots as pictured.
Next take the thin strips pictured, spread glue on them and insert them at the point of the folded horn. We haven’t got the glue in our photo, make sure you have, you’ll need enough glue that you are sure the horn will be sealed at the end.
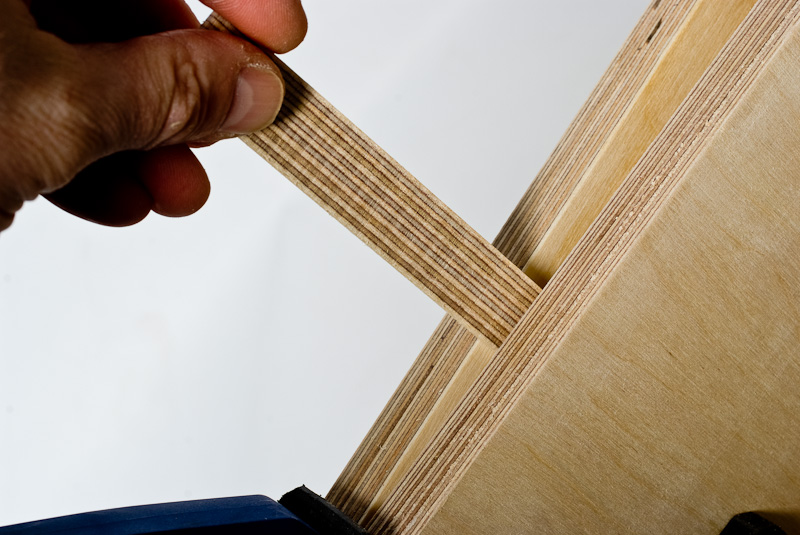
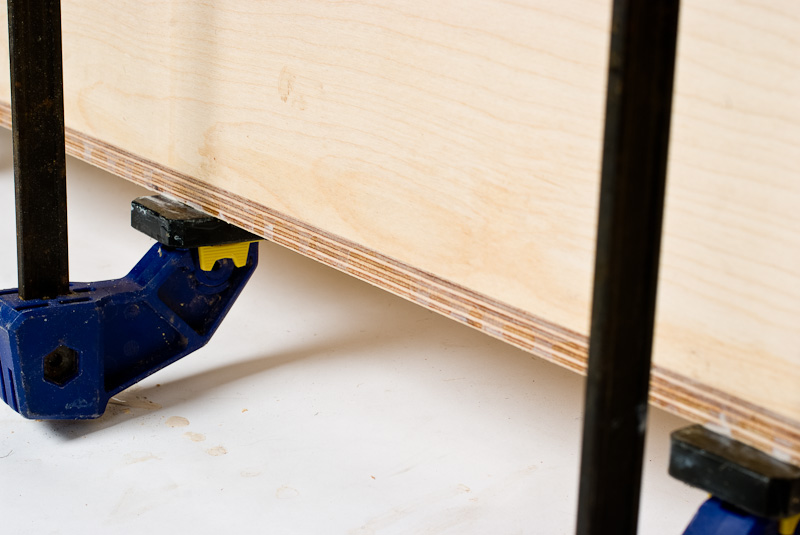
Push the filet in at the bottom using a thin strip of wood or a screw driver blade. You only want the fillet to find it’s natural place, do not force it otherwise you will force the panels apart.
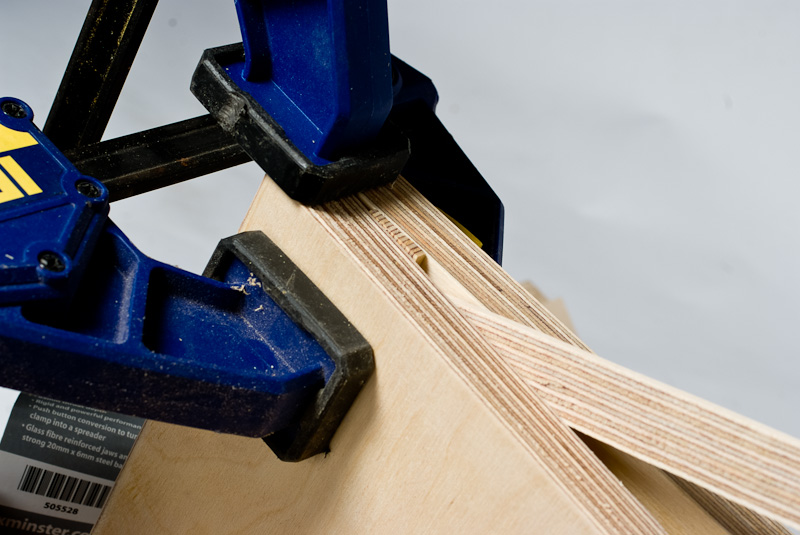 Fillet clamped in place
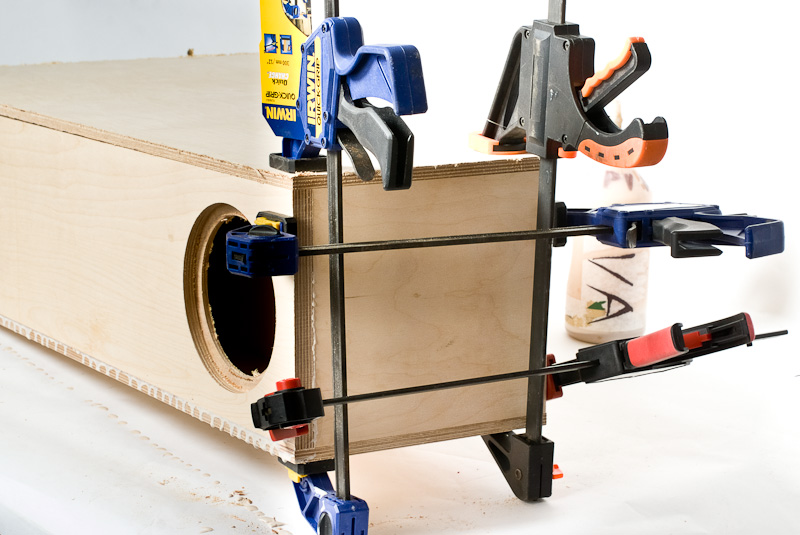
Once you have done this you can add a pair of clamps to hold it together. Also use a clamp to make sure that the panels are all the way down into their slot. Use a clamp at the other end as well.
We have included a few bits of spare ply in the box, you can use these as a clamping Caul to apply pressure on both of the panels.
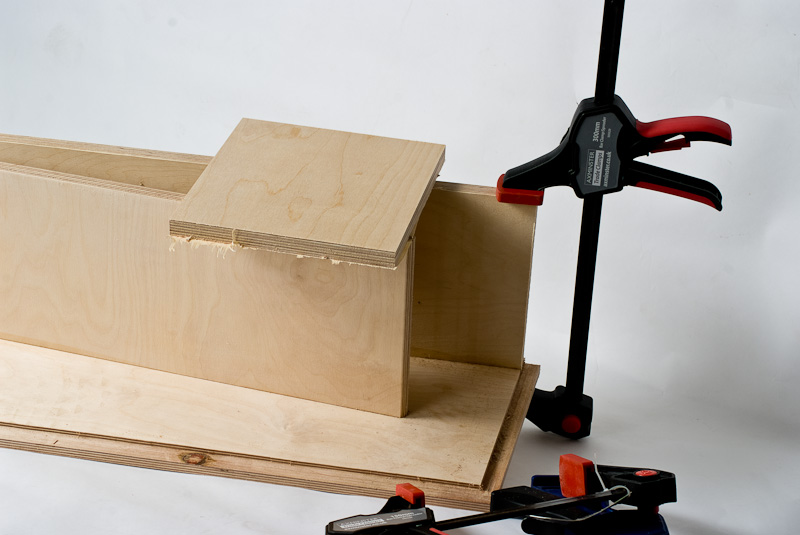

Once you have got these boards clamped in you’ll need to remove the clamps, they were not to hold the panels while they set, just to make sure the boards sat all the way home. The next step is to add the other side panel. Do not glue it at this stage, it is just being used to hold the panels in place and to allow you to check everything is square. it will also spread the load of the clamps that will need to stay in place while your glue sets up. The next few photos do not have the top panel in to allow me to get some close ups but you will want to make sure you have it in place.
Make sure your panels are square with the side panel. You can add a clamp to hold it while we check for square at the other end as well.

Remember that you will have the top in place.
Next add the top panel, the important bit here is to make sure that the slightly chamfered edge is at the front and lined up with the edge of the rebate, not the front of the panel. We are only gluing it to the back panel and the bottom, do not add glue at the top yet, this is very important! Do not glue the top facing side panel down at this point!!
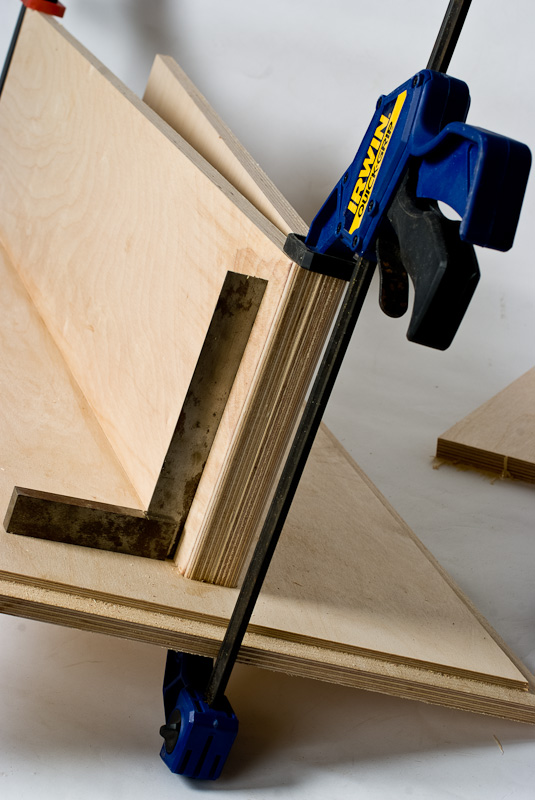
Place the front baffle in place, but do not glue it yet. You can now use the junction between the side panel, the baffle and the top to check everything is square, once you are happy add a clamp to push the baffle toward the top panel.
 Clamp and check for squarenes
Check for squareness at the top as well, the top panel should sit all the way back into its rebate and be square with the baffle, if it’s not jiggle things until they are, you may need to loosen you first clamp to accomplish this. Once you are happy add a clamp top to bottom and another one across. once you are all clamped up, use a damp but not wet cloth to wipe and excess glue drips otherwise your be sanding forever later on!
If you have run out of clamps at this point you can stop here, if you still have some more clamps you can carry on, we sell clamps in our shop so you can purchase more if you want. In fact, at the step above where you added the front baffle you could add the glue and continue around with the clamps. If you have to wait for the top too dry first, do so and then continue on.
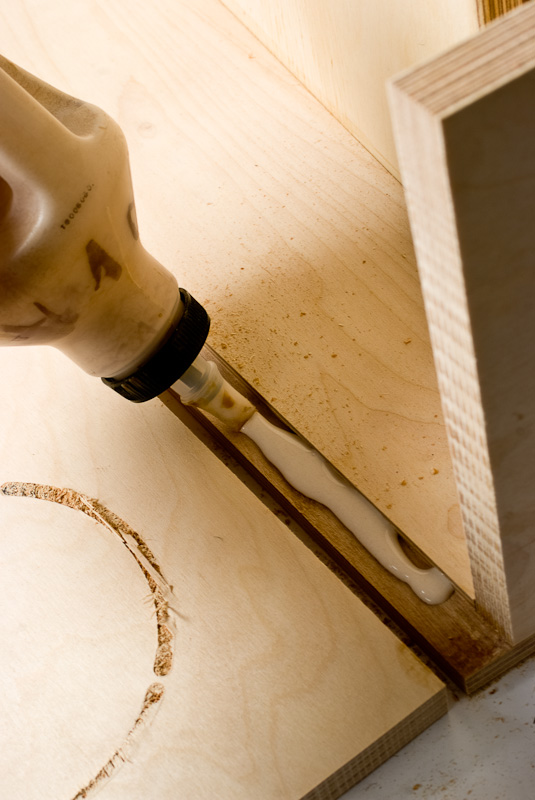
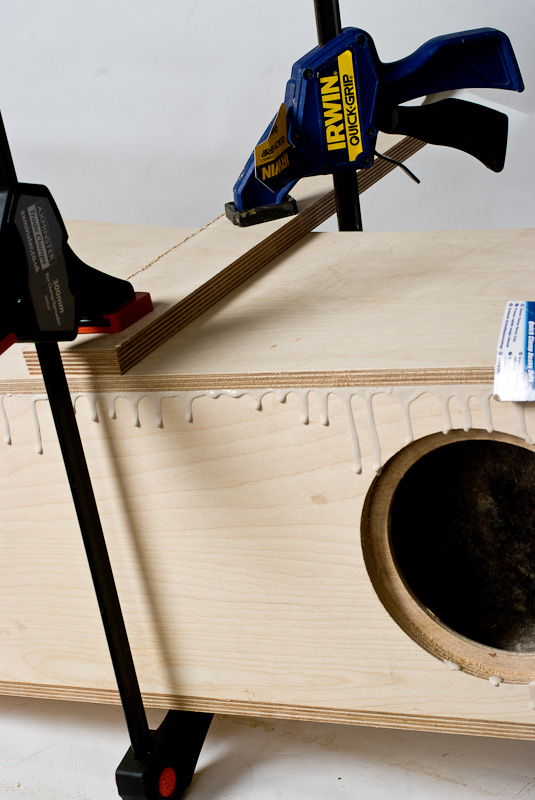
Add the glue to the front baffle rebate and the leading edge of the top panel and place the baffle in place.
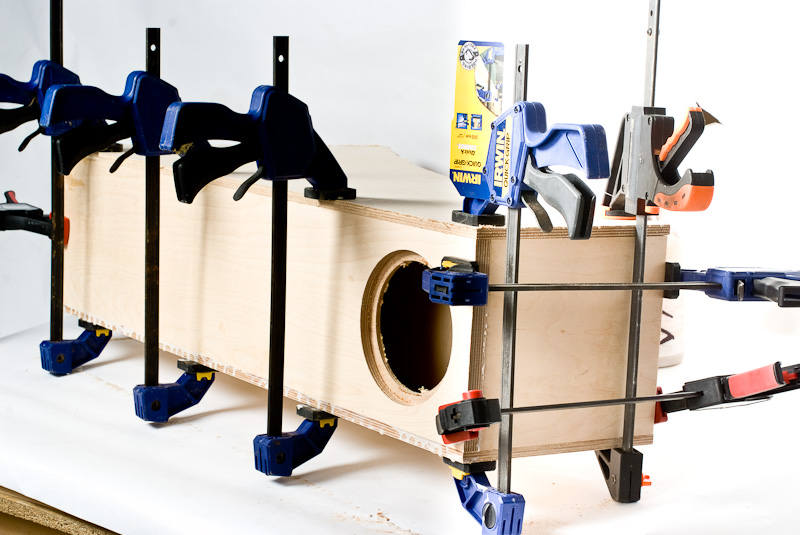
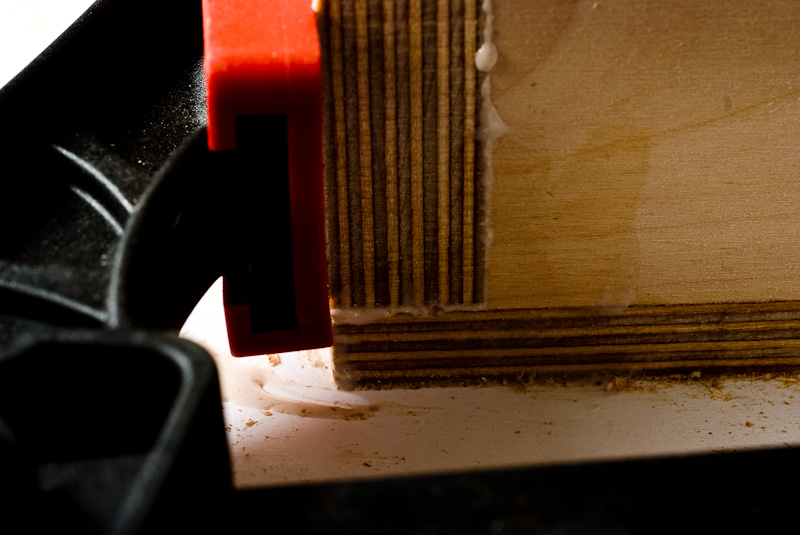
Add as many clamps as you can, notice that the clamps are close to the edge so that the pressure is acting in line with the front baffle, not bending the panel.
Notice that I have wiped up the excess glue.
Again if you have enough clamps you can continue, if not let this dry and then move on.
Add in the bottom panel, again making sure that the chamfered edge is facing forward, the panel also has blind holes for the threaded inserts for the spikes, this needs to be facing downward. The method for this panel is the same as for the bottom panel.
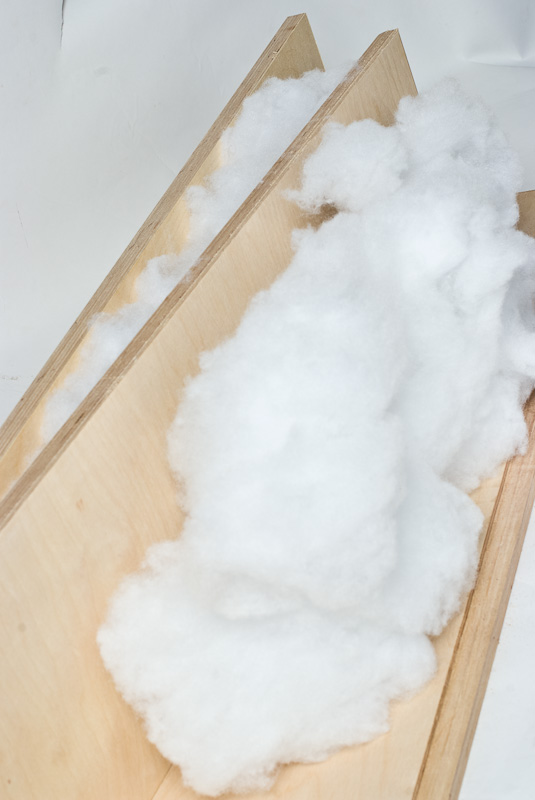
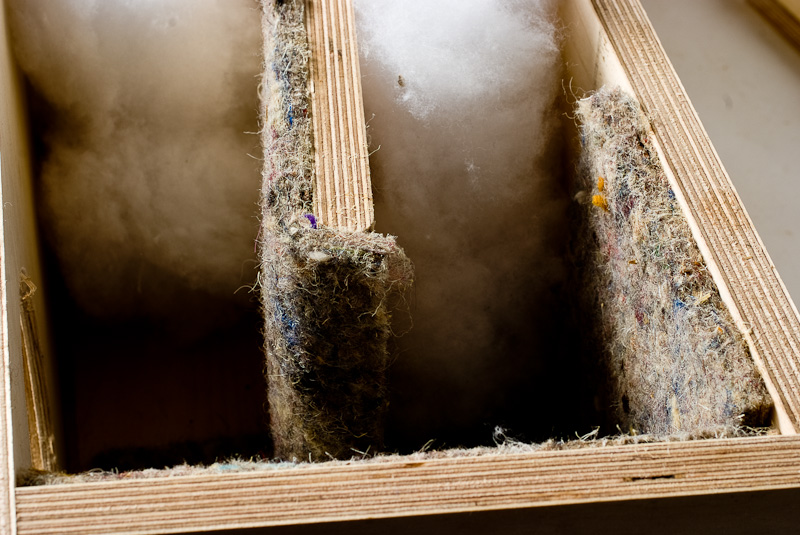
Once all the glue is dry remove the clamps and remove the unglued side panel so that we can do some stuffing. For the sake of clarity the pictures below do not have the front baffle in place so that you can more easily see the stuffing.
First thing to do is to divide up the stuffing you got in the kit into 4 equal weight piles, set aside 2 for the second speaker. Fluff the two you still have out so that the density is equal with no tightly packed areas or voids. Make both of them the same size as pictured.
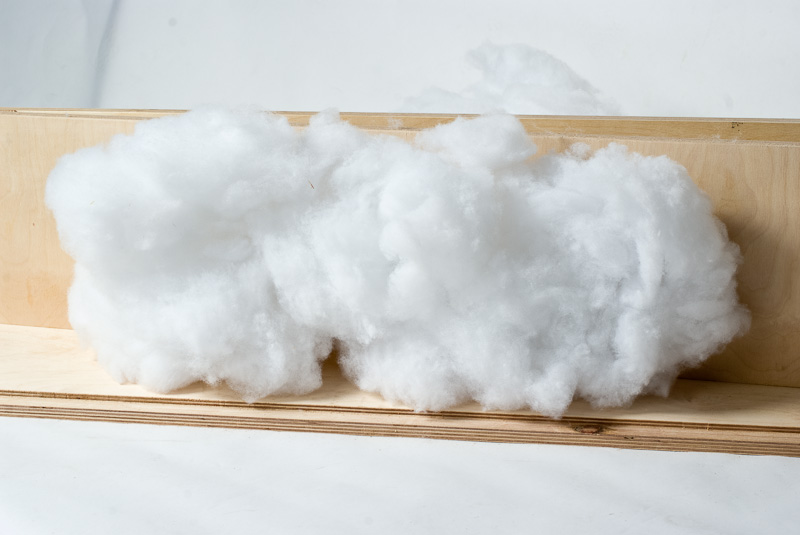
One of them is to fit between the baffle and the inside panel and the second to fit between the back and the inside panel. Take the second piece and squeeze one end to a point and push it into the tapered end of the horn, the other end should be no more compressed than the stuffing behind the baffle. You’ll not be able to change the stuffing in the back part of the horn after the speaker is fully built, you will just about be able to adjust the front part though, through the hole for the speaker drivers, and with a hand up the back of the horn exit, you may want to adjust that to taste but start at this point.
Next glue the pieces of felt in, you have bits cut for the side panels already that came with the kit, you also have more than is needed for the rest. Take the large piece and cut a 20cm piece, then take that and subdivide into a 20cm and 2 x 14 cm Pieces. You’ll need carpet fitters spray glue next. Check the fit of the side piece, once happy go to an area where you can spray glue without being overcome by fumes and where a bit of glue over spray isn’t going to matter to much! It’s a good idea to wear nitrile gloves to keep your hands clean and in case you are allergic to the glue. Spray the glue generously on the back side and wait until the glue goes tacky, (it will say on your can how long you can expect this to be) while this happens add some glue to the panel of your speaker where the felt is going. once the glue is tacky, bring the two surfaces into contact and press down hard for a minute or two while it sets.
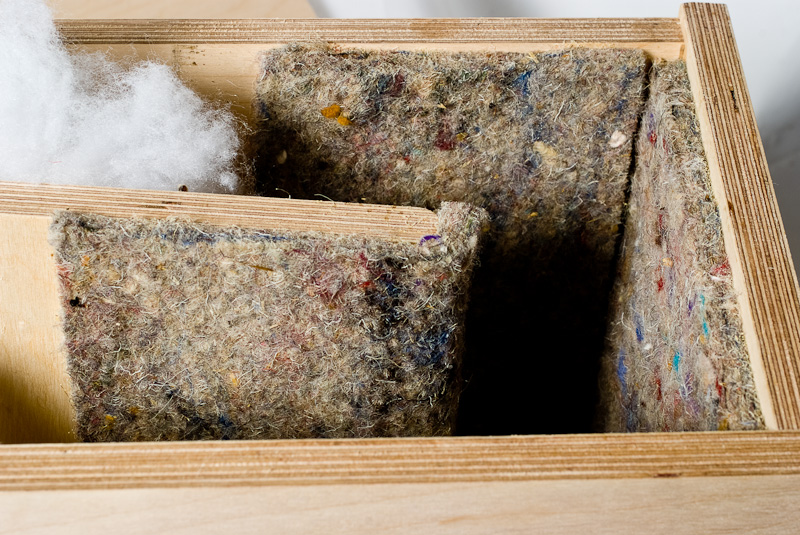
I start with the side panels. then back, then inside, then top last, but you will find a way that works best for you, it is the fiddliest part of the whole process.
You are nearly there.
Next you’ll need to add your connectors, if you are going to use faston connectors to connect to the binding posts you can go ahead and screw the binding posts in place, if you prefer to solder the cable to the binding posts separate the positive and negative cable from each other if you need to use a knife please be careful then solder the cable to the posts. Thread them through the holes and tighten the nuts. The binding post have two coloured rings, choose one of them. One has a small notch and one is just flat. the one with the notch is supposed to stop the connector turning, if you want to use that you will need to take a sharp knife (careful) and make a female slot in the back of the speaker to accept it. I don’t use them, the connectors have a spring washer at the back and the other colored ring is serated, once tightened, you’d have to be trying quite hard to twist it. Hang the other end of the cable out of the front of the speaker.
You are now ready to glue in the other side panel. Firstly add glue to the edges of the other panels that you have already glued in place and then locate the second side panel.

Use one of the pieces of spare wood as a clamp caul again and clamp the panel all of the way around. and wipe away the excess glue with a damp cloth.
Lastly if you want to use the spikes, add the included inserts to the bottom panel and thread the spikes into them.
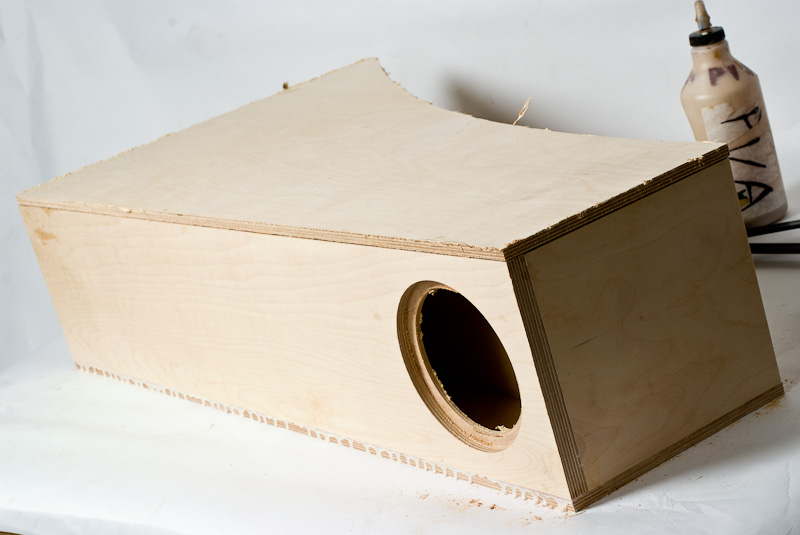
The speaker is now ready for your driver to be added and some music to be played. Remember that these single drivers do not enjoy as much excursion as other drivers so be careful and make sure you run them in for a while.
Move the competed speakers into place and enjoy the fruits of your labours.
I want dimensional drawings of Frugal-Horn XL. Thanks!
Hi Huong,
The plans are available from the Frugal Horn website
You’ll need to either pay a donation to the DIYA forum or get someone to build you a kit who is a commercial licencee like us. Info is on the page I linked to.
Thanks for the tutorial, now I finally know how to glue up a flat pack kit 🙂 ?
Cheers, and nice work in the Pensil kit.
Just received my FHXL flat pack yesterday. I’ll start gluing it up over the weekend but have to say, the quality is absolutely top notch. Beautifully cut and routed with everything thought out to make things easy and promising an incredible finished product.
Thanks a million Stefan!
Very well done.
Deniz, thanks for the positive comment, it makes it all worthwhile, don’t forget we like to see photos of finished builds so don’t forget to send me some. It’s my overriding mission to make building speakers like the Frugel Horn XL as easy as possible so that as many people as possible can end up with a top notch speaker. We’ll have more kits coming online gradually for some of the other Mark Audio drivers, although making sure that those finished kits are as easy as possible for DIY speaker kit builders to finish does take me quite a while so that progress is a bit slower than I’d like 🙂
When I ordered my Frugel Horn XL kit Stefan asked if I could hold on for a couple of weeks as he had redesigned the flat-pack which would make it easier to build and finish. The new design works a treat without the need for clamps, everything is held with masking tape. It took me only around six hours to build both enclosures and another four hours to fill, sand and seal them. They have been running for 100 hours now so the cones have had their initial run in period and wow! They sound really good. This is a great kit that anyone with the most basic woodworking skills will find easy to complete.
Top work Stefan.
That’s a great review Rob, thanks a lot for the comments and for sending me the great photos
The Kit is very well packed. The cuts are very accurate. I carefully assembled it and let the finish (polyester varnish) to a professional for a better result.
The sound is really good and very detailed compared to my previous speakers.
I recommend!
I put some details and pictures on diyaudio forum (CuBe5) and would be happy to answer on potential questions if they are some:
https://www.diyaudio.com/forums/full-range/246248-frugel-horn-xl-alpair-10-3-10p-fostex-ff165wk-108.html
Quentin