

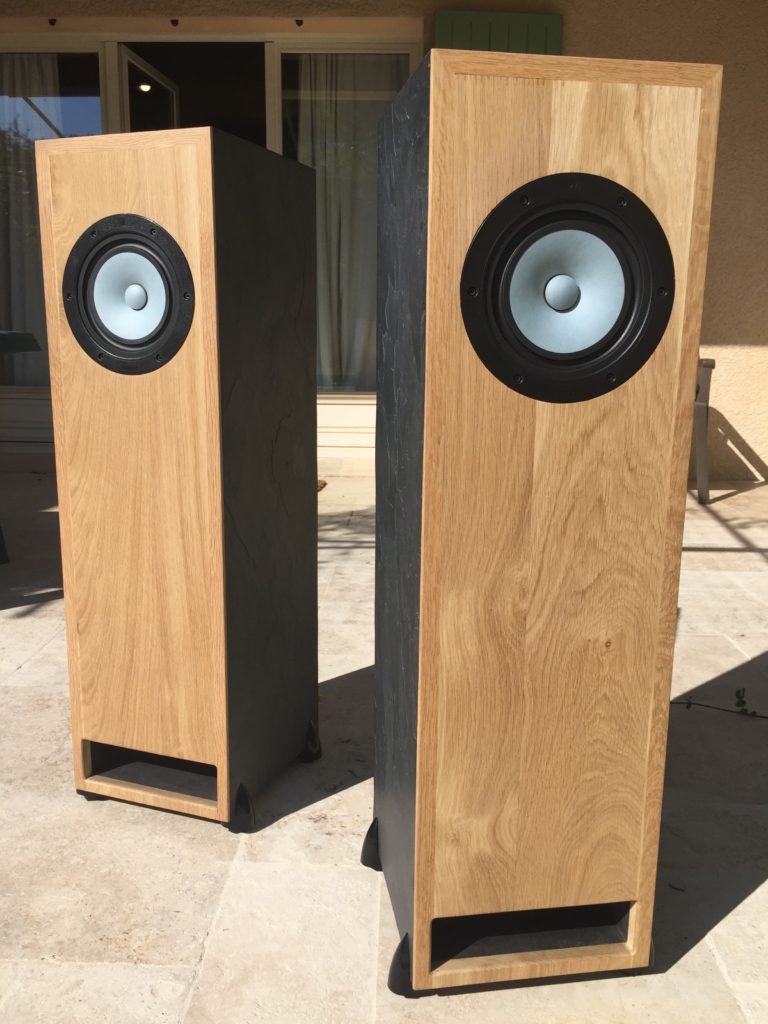
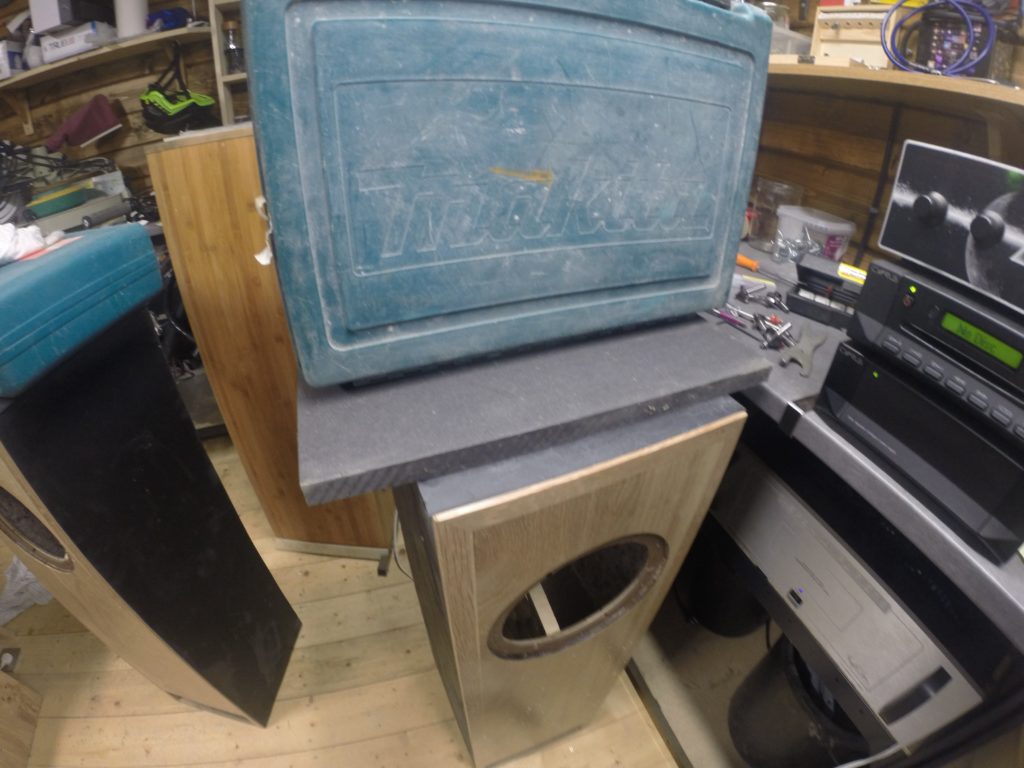
Stefan asked me to do a log of my Alpair 12P build; as I was not expecting to do this I have not taken photos of each step, but I have enough to give you a good idea about the construction. Some of the images are a little distorted due the type camera lens I used. The first image is of the finished speaker.
Materials summary as follows:
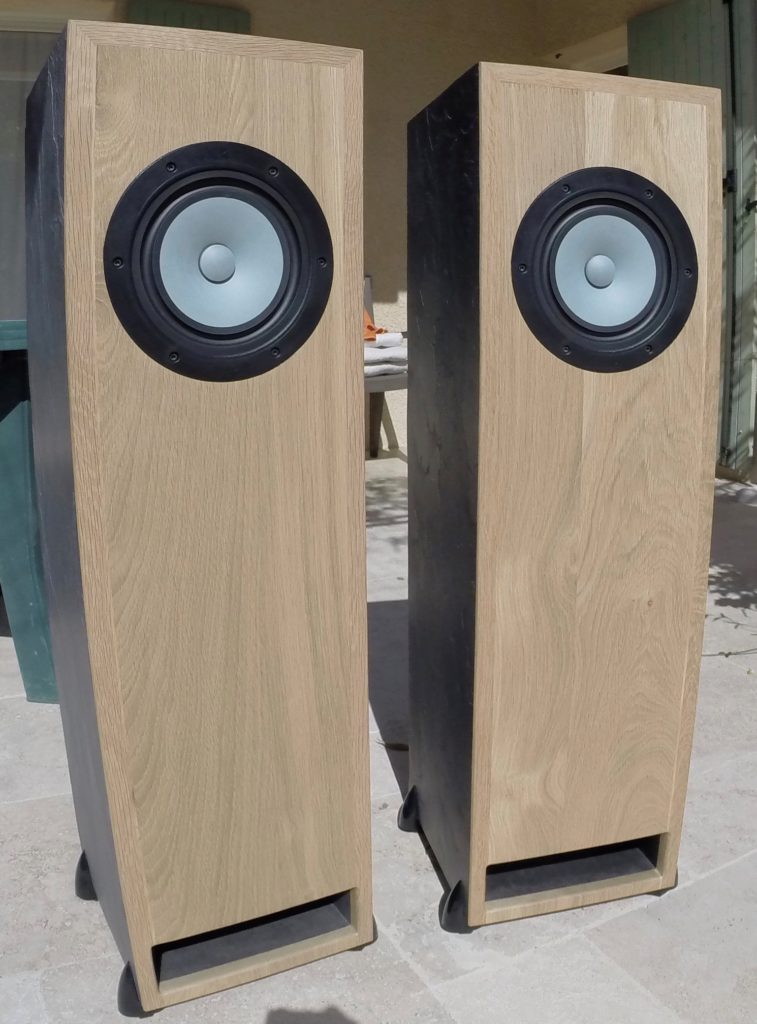
– Front and back panels are 20mm oak
– Sides, top and bottom, 20mm black MDF (covered in stone veneer or slate skin)
– 600ml tube of glue, supplied with the stone veneer
– 1 tube of black car and boat sealer.
– Feet are supplied from Stefan with the spikes removed and replaced with a plastic foot,
as my house floors are all tiled.
– Jantzen 16 AWG silver plated copper hook up wire
– 1 pair of binding posts.
Before the sides, top and bottom were put together (butt jointed), I used a router to make a rebate for the rear panel to sit in. Rather than running the cutter right through on the side panels, it was stopped 10mm short in order to make the rebate complete all the way around. Any discrepancies in the corners after construction were tidied up with a chisel and a little wood filler.
First assembly of the top, bottom and sides was then carried out, with screws only, as the glue would be applied later.
Next was the preparation of the front panels.
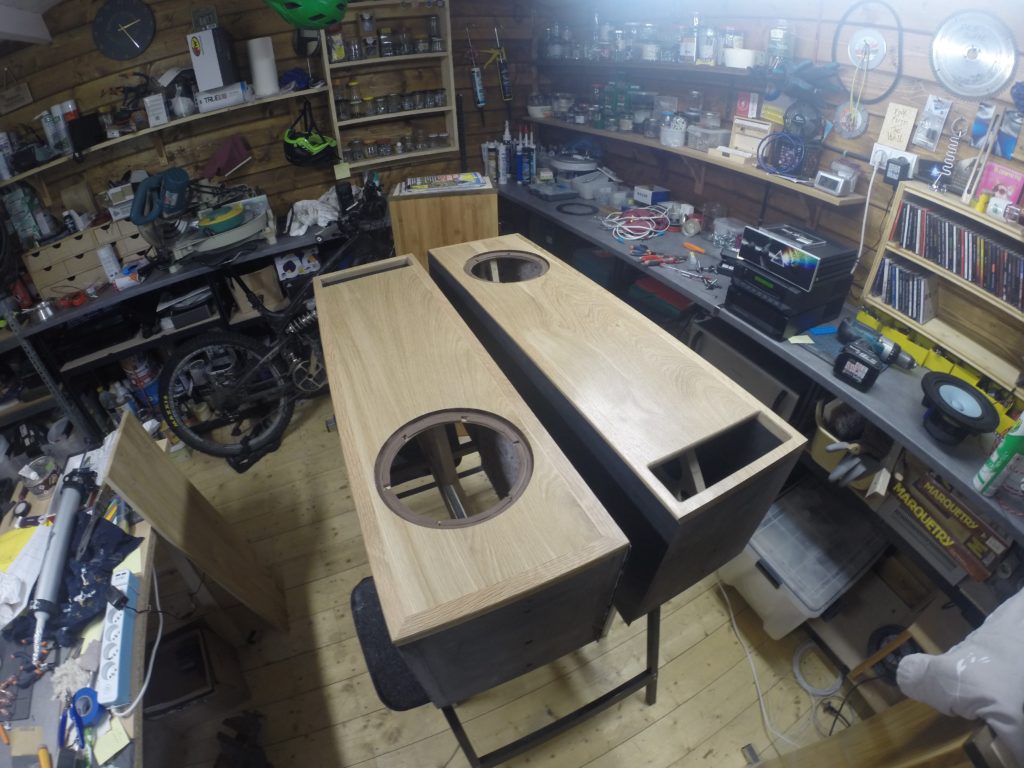
Cut the panels height and width to match the MDF carcass, rebate the sides and top 20mm in and around 4/5 mm deep; this needs to be slightly shallower than the fillet that will be glued in later; do the routing for the driver hole as instructed in the Pensil 12.2p guide. I made mine so as the driver sits just under 1mm proud of the oak.
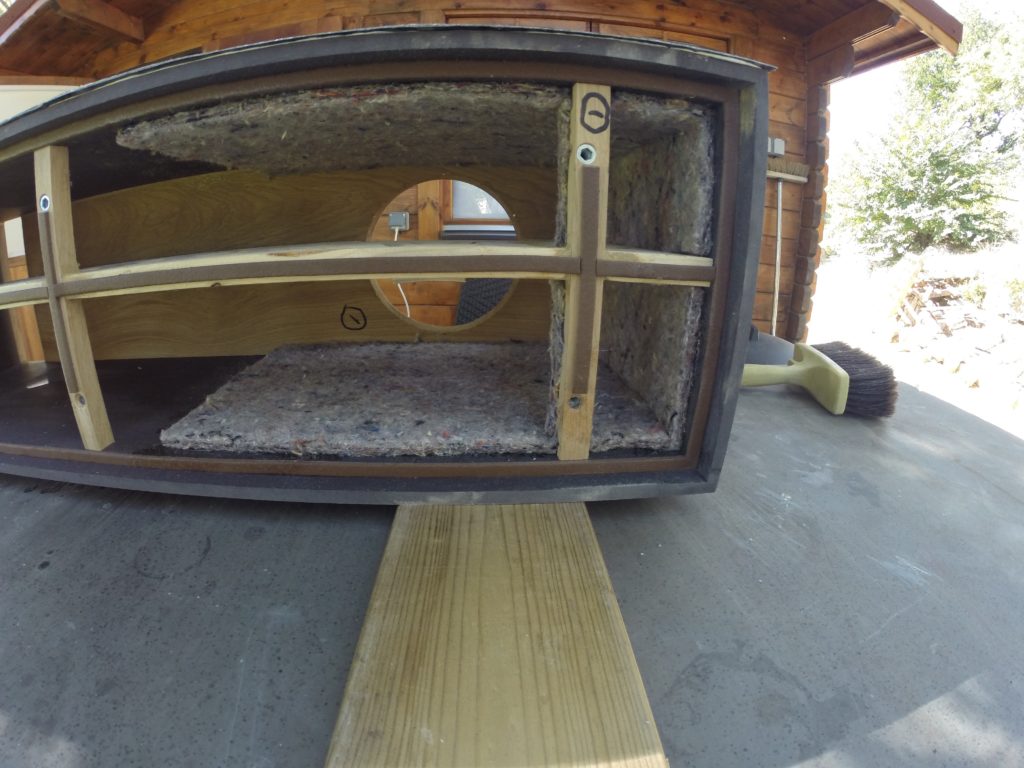
The bottom oblong was routered out at this stage, but is a little weak in the corners (until final gluing). I also routered internally a 2mm deep slot, slightly off-centre, to glue in the bracing. The bracing for this design is optional but very handy for holding the damping in place.
Screw in the front panel up the sides and along the top, using a counter sink for the screw heads.
Disassemble, then glue (PVA) and screw everything back together. The oak and MDF need to be flush; if the oak overhangs, run a straight router blade with a guide wheel along the top and down the sides. The bottom can be left for now.
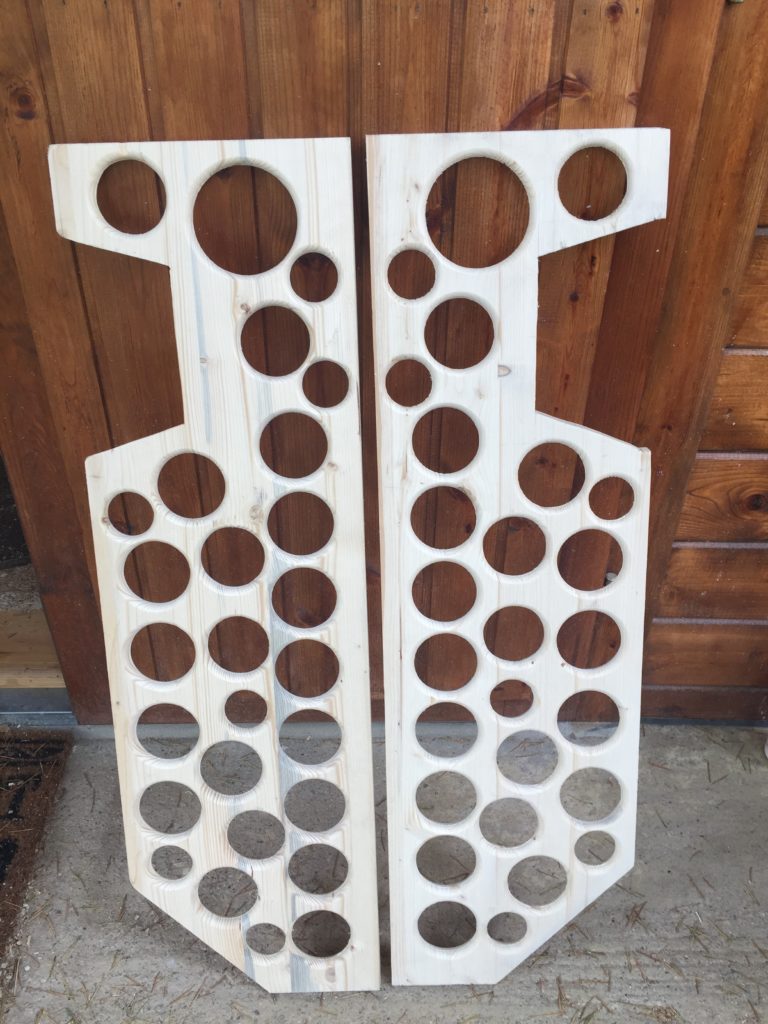
Cut and prep the braces as per the build guide; I was perhaps a little over zealous with the holes but I doubt it will make any difference.
I then glued the brace into the slot that was pre-prepared on the inside of the front panel, and used screws in the top and bottom to secure everything. The bracing was cut slightly smaller than the rebates for the rear panel, in order to ensure maximum contact with the foam that sits in the rebate when the rear panel is tightened up.
Use some of the oak offcuts to brace horizontally across the carcass; once cut to width, you need to make a notch in the bracing for them to sit in place. They are then screwed through the MDF sides and into the bracing, again left slightly lower than the rebate to ensure good contact with the foam when the rear panel is fitted.
The MDF in the middle may bow out slightly at this point; simply use a sash cramp in the middle to hold everything straight whist cutting and fitting cross braces.
Then, cut the rear panel to drop in; I planed/sanded a slight angle all the way around, in order to ensure easy fitting and removal.
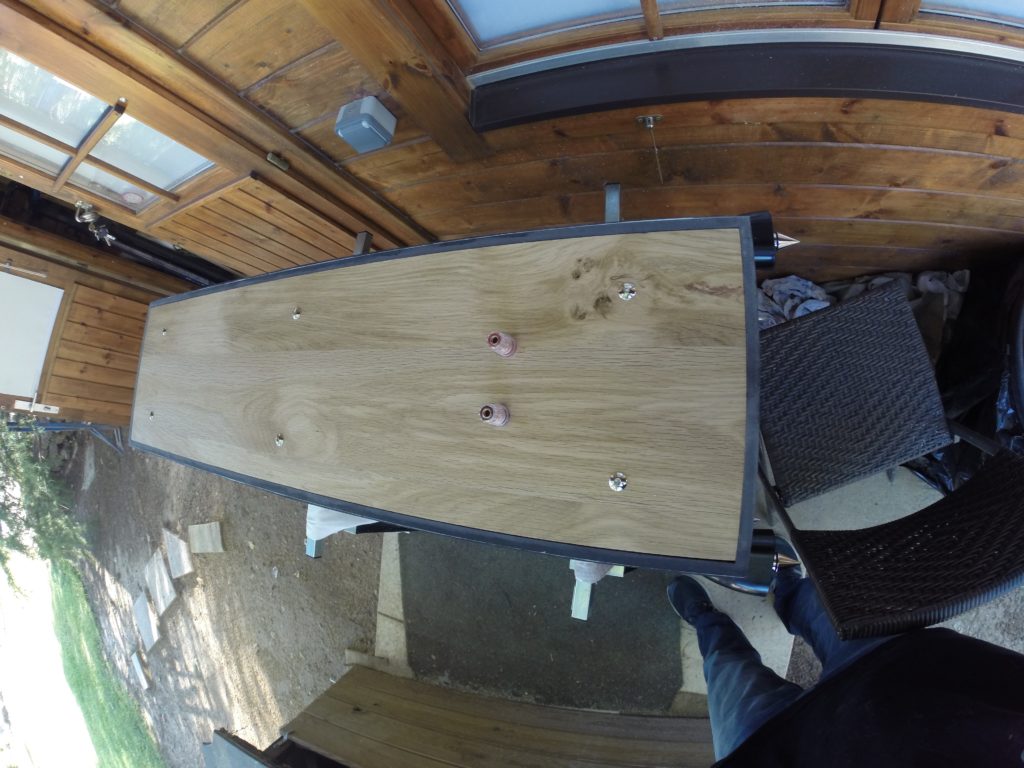
With the rear panel in place, mark and drill pilot holes (2mm) for the bolts; ensure that they will not foul against the screws that were placed through the sides.
Drill and fit the bolt taps and ensure that the holes in the rear panel are slightly larger than the thread of the bolts.
I also fitted then removed the speaker terminals at this point; you can just see the little slot that was placed in the brace for the speaker cable to sit in.

Now it gets a little bit tricky; I am lacking photos of this stage, so I hope these explanations are clear.
We now have a 20 mm wide x 5mm deep rebate up the sides and along the top; this needs a fillet of oak gluing in.
For this stage, I have used a mitre saw and a hand planer; if you have other tools like a table saw for the doing the rebates and preparing the fillets, things should be easier and more accurate. Cut the fillets for the sides and top about 60 mm longer than they need to be.
The fillets I bought are rounded on both sides, so first thing is to make one side square; the tricky bit is to ensure all the oak is touching everywhere with no gaps. Any gaps left will fill with PVA glue and detract from the overall finish. I used a hand planer to do this and put a slight angle on the fillet, which helped to ensure tight contact where visible.
Once all 3 fillets are touching the front panel all the way around, cut a 45° mitre on one end of the side fillet, leaving it square and slightly long at the bottom. Then, mitre the top fillet and ensure you have contact everywhere. The fillets should overhang the sides and top by a minimum of 3 mm and be at least 1 mm proud of the front panel. As I say, a better equipped workshop would make all this easier.
When you are happy with this, glue the filets and leave overnight.
Once set, use a belt sander to make the front flat; if you have little experience with this type of machine, go easy, as it can remove too much material very quickly, so frequently remove the sander and check how flat it is with a steel ruler. At this point, you can also finish the vent at the bottom.
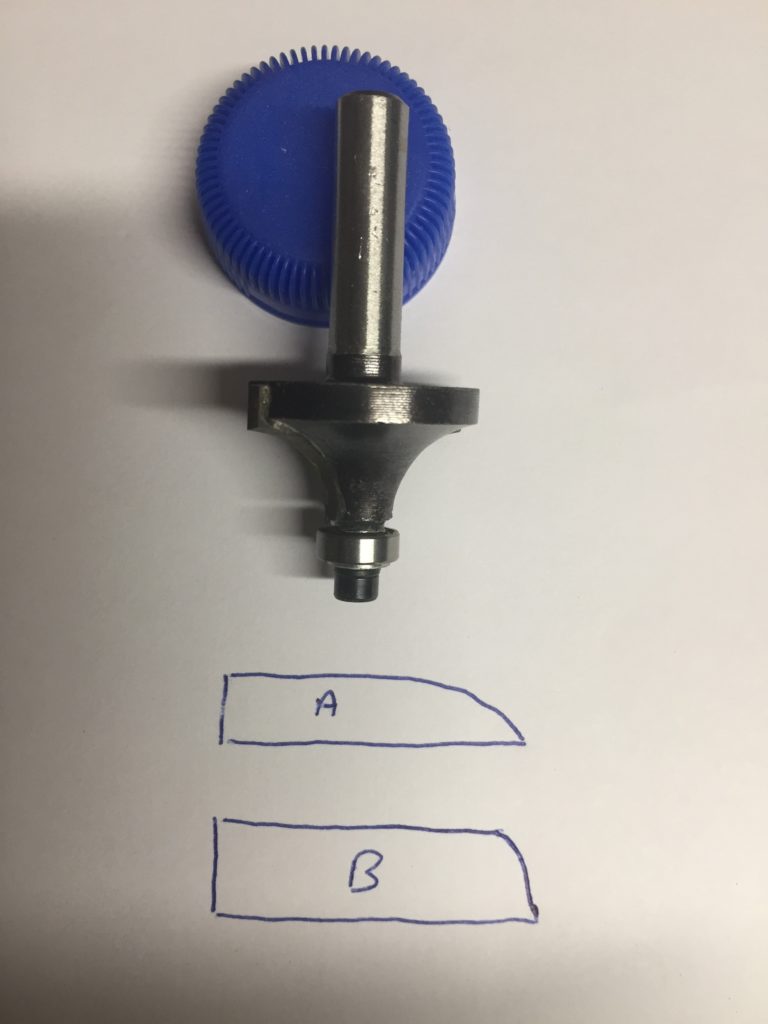
In order to route around the filet and leave a 2 mm overhang, I used the cutter in the following photo but instead of the wheel that is shown, I removed it and fitted a larger one which held the blade off by a fixed amount all the way around. A test piece is advised before attempting the real thing.
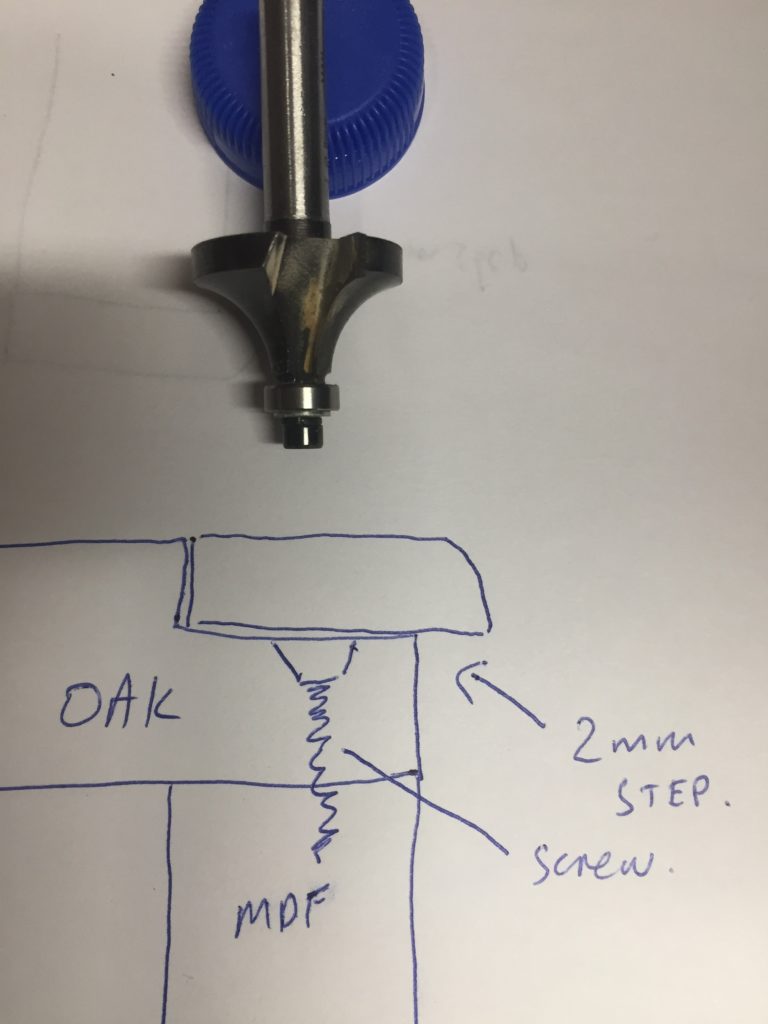
If the blade is too low, it will make a shape like fig A; keep the blade up a bit and create the shape as in fig B; this was much more successful.
One other thing: if the router is attempting to take off too much material, it tends to snatch, so use a hand planer first and leave the fillet slightly larger than it needs to be before routing.
I then did all the sanding and waxing of the front and rear panels. I simply used lots of fine grade paper, followed by beeswax and wire wool, about 6 coats with 1000 grade paper in between each application of wax.
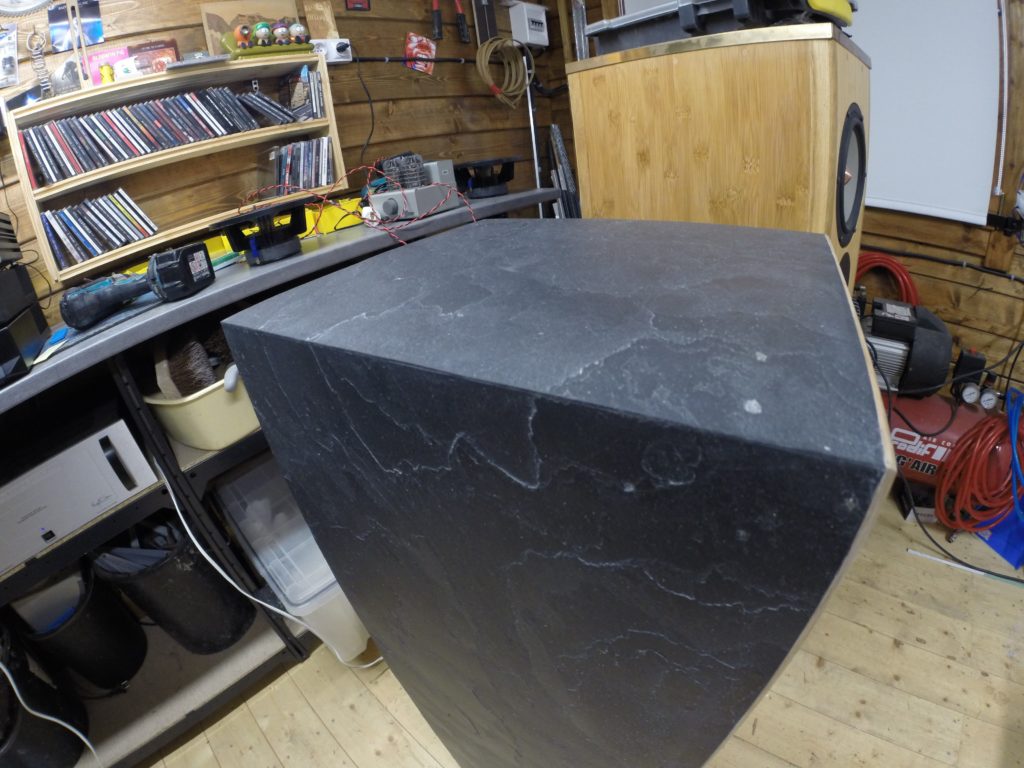
I found various suppliers of stone veneer online; if you Google search (stone veneer 610 x 1220) their are several suppliers dotted across Europe.
Fortunately my local Leroy Merlin supplies the slate version, which luckily was the one I wanted; if you are buying from them, they call it slate skin.
It varies in thickness from 1 to 2 mm; I had no idea if it was going to be difficult to work with and was pleasantly surprised to find it quite easy.
The 610 x 1220 sheet is just the right size to fit one Pensil 12.2p; one 600 ml glue supplied with the sheets is enough to do both speakers.
I was unsure with the first cuts and used a Dremel circular saw blade; this worked, but was a little slow; try using a small grinder, as I’m sure this would work well.

The side sheets are cut to overhang by 3 or 4 mm top, bottom and back.
Then, place the machined edge against the oak lip; with one hand at the top and one at the bottom, gently rock the sheet whilst looking for any high points.
If it needs a lot of straightening up, filing a slight angle on the under side is helpful.
Then, keep filing all the high points until the slate touches the oak all the way along its edge.
If a particularly thin bit of slate could do with being a little higher after gluing, use a pencil to roughly mark that area on the MDF and apply a little extra glue there.
Before applying the supplied glue, put one bead of black car/boat sealer along the top, bottom and back edge, but not along the oak lip. Then, apply the supplied glue in lines all over the MDF and about 2 mm away from the oak lip. Position the sheet with a little overhang top and bottom and press down all over the sheet to spread the glue (not too hard if you want the sheet a little higher against the oak lip in a certain area). Use one finger, a rag and a little cleaning alcohol to remove any glue that has squeezed out against the oak. If you can see any bits of glue on this edge, take some of the offcuts of slate (not the backing resin) and crush them using a mortar and pestle to make some slate dust. Dip your finger in it and lightly rub it into any bits of glue that are showing. Excess black sealer on the top, bottom and back can be left; weigh it down with some power tool boxes and leave overnight.
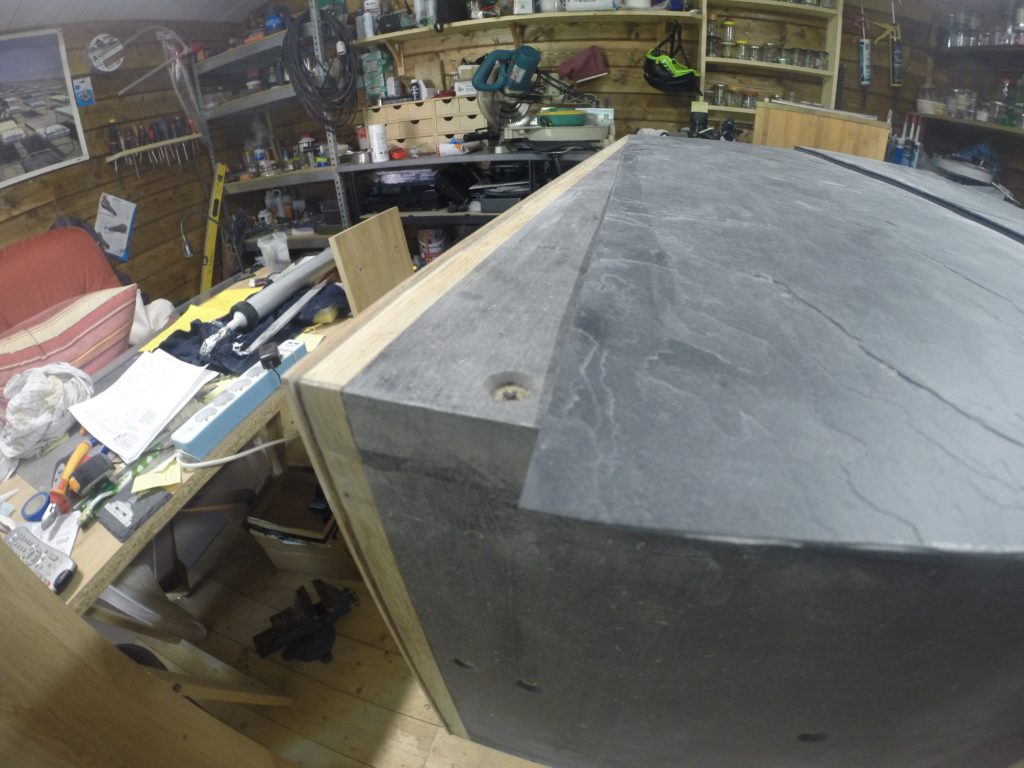
When set, use a straight router blade with a guide wheel to make the side, bottom and top flush with the MDF. Move the blade up and down on occasion, as it wears out fairly quickly. The small amount of slate that is left on next to the oak lip can be filed off by hand.
.
Once the sides are set, glue the top on using the car and boat sealer along the sides and across the back. When set, cut off the black sealer, then use a file on the push stroke only. To tidy up the sides and back, I also found a Stanley knife blade used as a scraper worked well and helped to follow the shape of the slate below.
Before the final fitting of the driver, I taped the hole with some masking tape, then cut around the hole, leaving tape only on the face. After fixing the driver, run a small bead of black silicone (not car/boat sealer) around the circle; run your finger around it and wipe off any excess with a rag and alcohol, then immediately remove the masking tape.
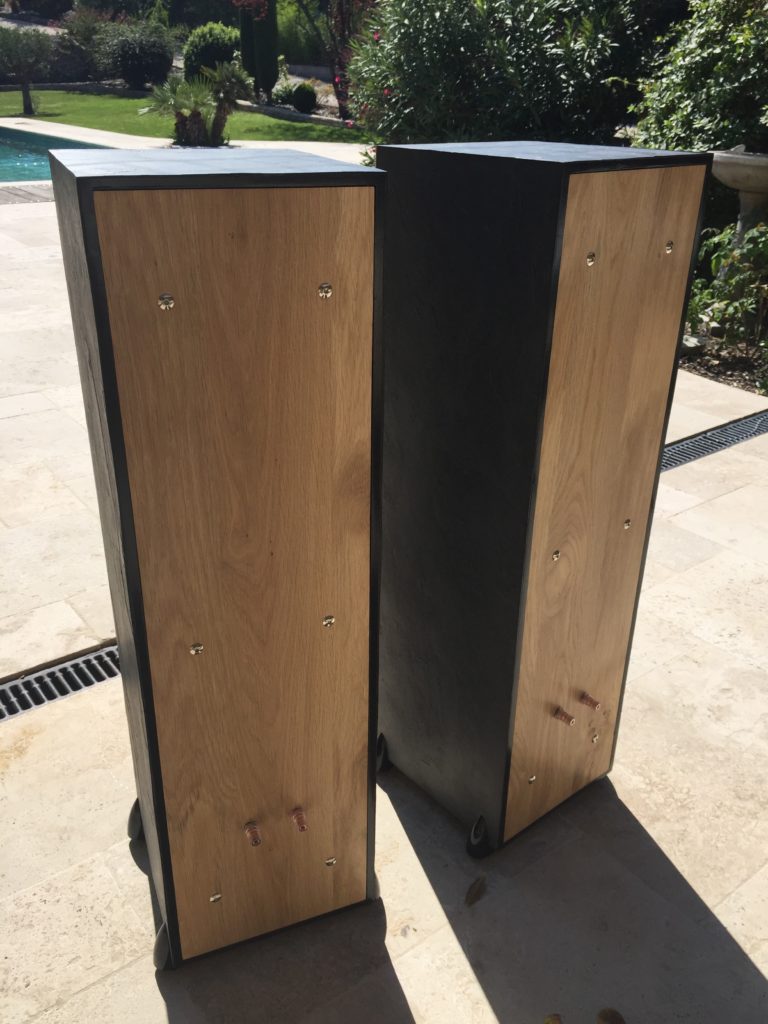
My screws didn’t hold too well in the oak, so I swapped them for some small black bolts with wing nuts on the inside.
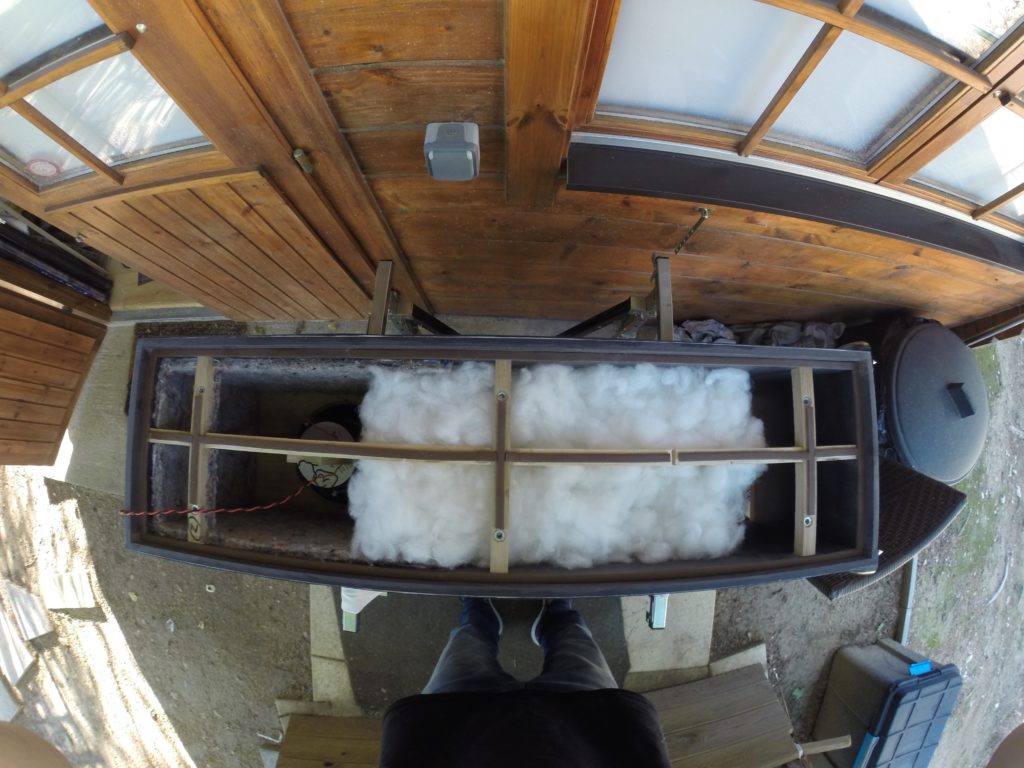
The above shows the felt damping. I also glued 4 squares onto the rear panel, which drop into the holes above. Remove any of the spray glue with sand paper; even when set, it will stick to the foam edge when rear panel is tightened up.
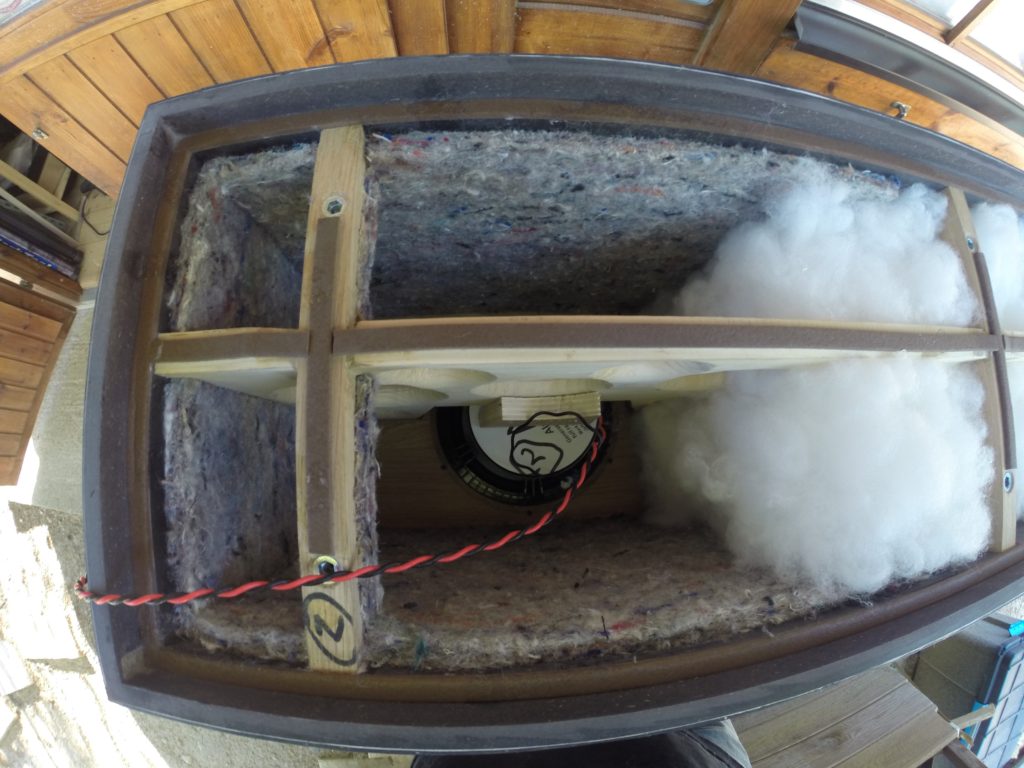
With the driver in place, screw a small block of timber onto the bracing, using a stub screwdriver. Pre drill clearance holes in the block to make it easier to do. I placed a small strip of foam where it contacts the magnet, and applied a little pressure whilst fitting screws to make a snug fit.
The MDF that shows around the back was painted with universal black gloss.
With the rear panel removed, mask around the slate to make it easier. Any bits of paint that got in between masking tape and slate scraped off afterwards with a Stanley blade.
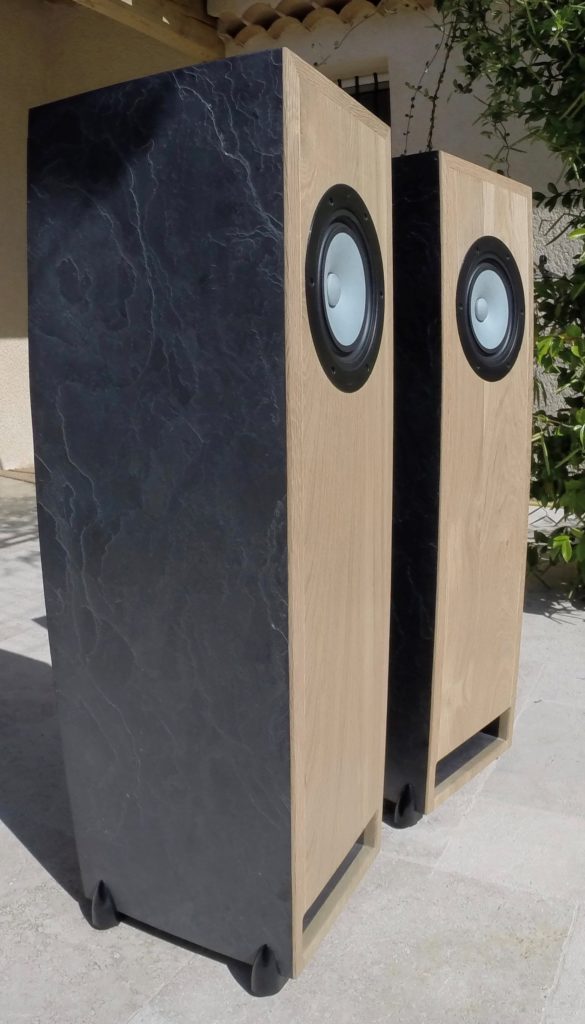
The slate can be left in its natural state, as I have, or you could use some WD40 for a different look. Try it on an offcut first to see if you like it.