

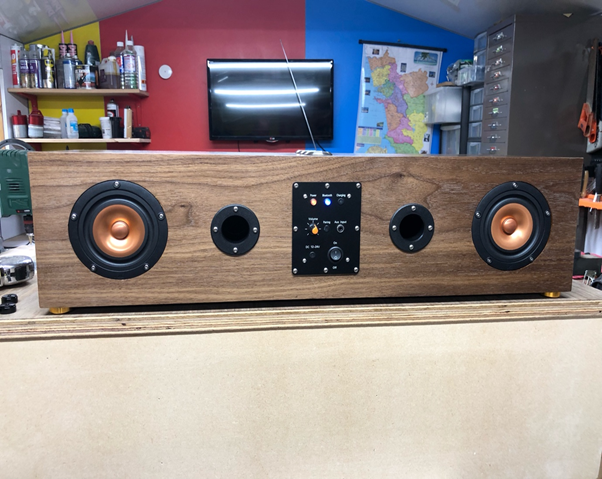
Here is a great Bluetooth Boom box style speaker build by a customer. I asked Andy to write this up for the site as I thought the project looked so darned cool. You can of course mix things up a little and use different speaker plans or maybe on of the hypex plate amplifiers we sell on the site
Tools used
Makita table saw
¼ router
Trim router
½ router
Electric nail gun 38 mm max.
Belt clamps
Rule
Squares
Tape
Various clamps
Digital level/inclinometer
Trend circle cut jig
Sharp pencils.
Various Router bits.
38 mm Forstner bit.
3mm wood drill bit.
Bosch pillar drill
Digital Vernier calipers…..essential.
Blue latex gloved…..essential.
Hole saws/starrett
Materials used
18 mm Mdf
Walnut iron on veneer/Amazon
Gorrila glue/water activated
Pva glue
3mm aluminium,for back panel.
Off cuts of ply to house amp and power supply.
Furniture vents 38 mm Found on ebay.
Hifi feet found on ebay.
Danish oil.
Furniture wax.
French polish.
Small brush cut at an angle for french polish.
3mm ptfe on a roll.
Draught excluder sticky back foam.
Thick wool carpet underlay 16mm thick???
Masking tape.
Spray on glue.
Roloc sanding pads
A2 stainless Torx 6 pin Stainless button head self tapping screws 16 mm long/buy all from same supplier as they vary in appearance.
Aluminium 3mm/upcycled.
38mm ports were difficult to find had to get them from America.
Electronics
Mark audio Alpair 7 ms full range speakers
Dayton audio Kab 250 v3 amp
Correct power supply for Amp board
Dayton audio control panel.Kab pm3 front panel.
Instructions
• Download a pdf of a suitable enclosure for the speaker.
• Make a cutting list
• Box size 750 wide x 230 deep x 188 high finished sizes.Mark audio website is a great resource for drawings.
• Good idea to put centre lines on all cut pieces both side.
• Cut mdf to size with angles cut at 44 deg these pieces have to be cut longer because you lose a bit when cutting angles. 44deg cut allows for play in box fabrication,glue expands. My cavity was 110mm add this to length for amp and power supply. Lay wood down on flat surface with mitres facing down,use a straight edge then apply duct tape turn carefully. Spray joints with water and apply gorrila glue,fold box together use box clamps check across corners for square let glue set then trim excess glue with sharp chisel when dry.
• Front and back panel cut slightly bigger than box these will be trimmed with a trim bit in router after fitting.Single piece covers back and front.
• Fit Back panel.using centre lines.
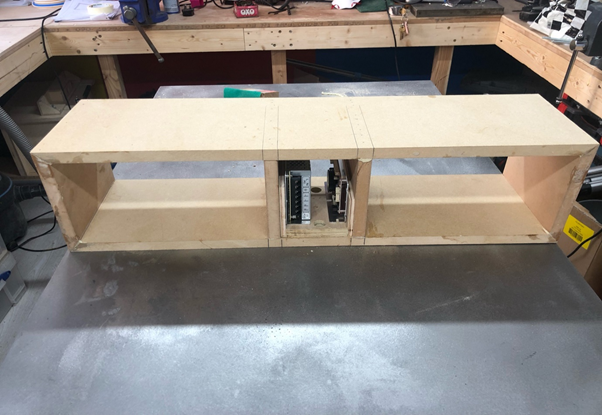
• Cut and glue wool on back,sides top and bottom of speaker enclosure see photo, front panel not yet fitted.
• Mark and cut out hole for control front panel/12 mm smaller than plate in front panel.
• Mark out speaker position and port position on back of front panel,also mark outside of box and inside of box with centre lines, and cut some wool to fit,mark centre lines as front panel is bigger and needs aligning before trimming with router.
• Mark centre lines on fabricated box.
• Spray seems with water then apply gorilla glue. Fit front panel using centre lines
• Drill holes through front panel hole on an angle with long drill bit 100 mm plus when amp is put in on fabricated carriage. Speaker cables go through holes to speakers/the speaker connection on the Dayton audio amp could do with being longer/next build buy molex connector and use/fit quality speaker cable, Dayton cables could do with being longer.
• Fill any imperfections in box and sand with a DA sander.
• Clean with damp sponge
• Use a roller and cover all sides with pva twice, let coats dry in between.
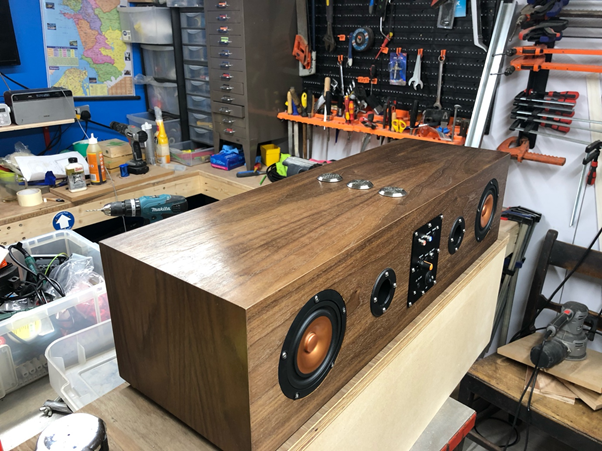
• Fit iron on veneer top bottom and sides, use an aluminium roller over veneer,be careful near edges.
• Fit veneer front and back use trim router to finish. 2” masking tape front and back and top and bottom to avoid scratches. Pencil marks show up well on the masking tape.
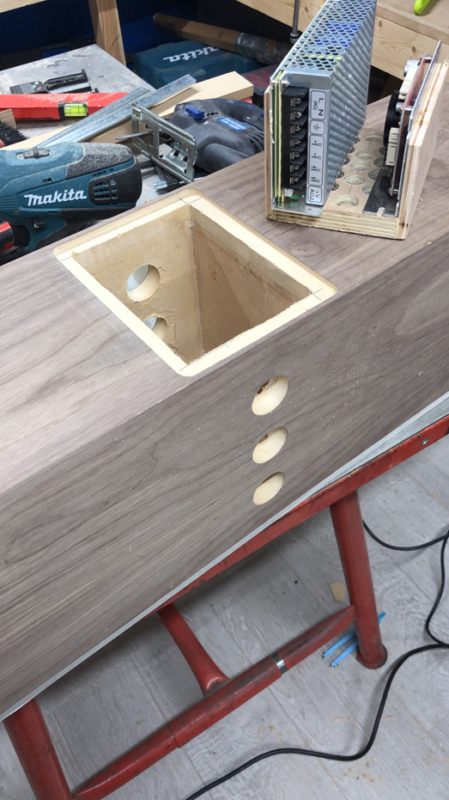
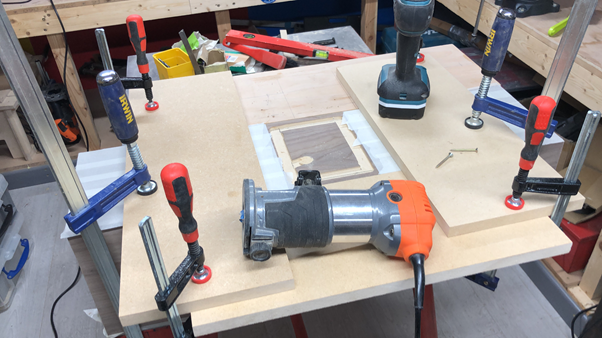
• Set up router to cut back removable panel use off-cuts to get correct size jig, once recess is cut, mark hole, cut smaller with jig saw then use a trim router to finish see photo.
• Mark speaker position and port position.
• 5 mm hole in centre of speaker use trend hole jig and cut recess think I used a 16mm flat cutter then a 4 mm edge cutter for the speaker hole. I cut 5mm deep recess I think check or do a trial cut in some scrap wood/not sure about doing this again poss just cut hole and mount speaker flush
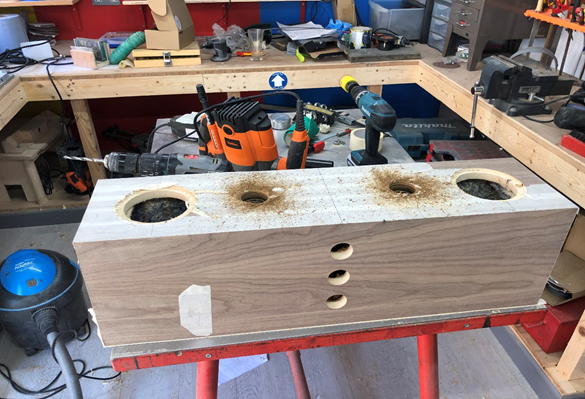
• Cut holes for ports with a hole saw
• Cut holes for vents with forstner bit.
• Where the holes have been cut speakers and access into back I carefully painted a dark french polish on the edges of bare mdf, have a cloth to remove any excess/this went really well apply as many coats as you need.
• Oil the whole enclosure/leave for 24 hours.
• Re apply and leave 24 hours.
• Apply clear wax,this didn’t make a lot of difference/prob wont do it again .
• Apply 3mm ptfe tape to back access/could use foam if you can find any on ebay, I struggled ptfe is something we use at work
• Cut veneer where front panel will fit.
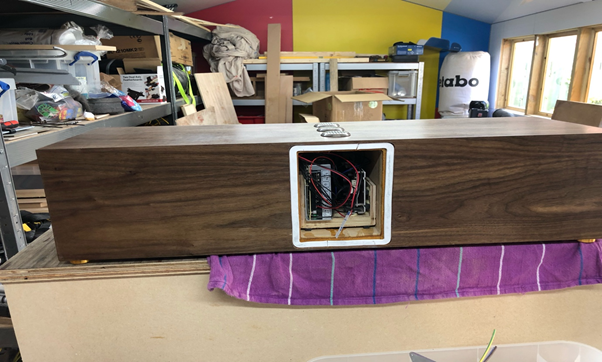
• Slide in carriage with amp and supply I stuck draught excluder to the bottom will glue to bottom of rear acces/ be easy to pull out if any thing stops working.
• Connect all wires and power,temporary rig up and make sure everything works.
• Final connect for speakers pull front panel out of way and fill holes where speaker wires go with mastic, let this set.
• Fit carriage connect up all wires. Put glue along the foam on the bottom and fix in position.
• Fit speakers,ports, vents Mark out with quality square top and bottom vents and the front panel and feet.
• Cut 3mm aluminium sightly oversize then filed radius corners to fit cut out from router.
• Used Roloc pads to achieve machine shop finish.
• Drilled hole in aluminium and fitted a plastic gland/I had a metal one but drilled the hole slightly too big.
• Drill for stainless torx screws
• Wire to power supply
• Tighten gland.
• Drill and fit screws.
• Test all is ok


Im not surprised to see this application of bluetooth, there are so many other things that can be done using bluetooth and wifi capabilities of android phones, wish there was a make it yourself kit…
Thanks for the comment Rahul, there certainly are many possibilities and they are made much easier with products like the Up2Stream Amp 2.0 V3