

These are the instructions for the constuction of your kit speaker, please read them thoroughly before you proceed.
The first thing you will need to do is find a flat area to work and spread out some paper to protect your surface from glue drips and scratches. Birch is quite soft and prone to getting scratched until you wax, oil or veneer it. Make
sure your work area is clear of bits, have a brush to hand and sweep the bits away at every opportunity. It’s also worth noting that birch ply is a wood product and can easily splinter, wear gloves to protect yourself from getting splinters.
To complete the kit you will need several tools, we can supply all of those tools or point you in the right direction if you haven’t got any of them. This is the method we have found has worked best for us, you may find a different way or have different clamps in which case feel free to modify the instructions to suit.
The most important thing to remember is that glue has an open working time which offers a relatively short window of opportunity to finish the part you are doing and ensure it is lined up and square. The glue we supply with the kits, if you have chosen to add it, is Titebond, an excellent professional glue. We recommend clamping a joint for thirty minutes to an hour. We recommend not stressing the new joint for at least 24 hours. Once you are happy with your dry fit and are happy you know your plan of action proceed to gluing, you’ll have about 10 minutes of working time. None of these photos have the glue used, this is a dry fit. Keep a damp cloth handy and wipe away any excess glue as you go as it will save much sanding later on. Don’t be afraid to get the wood wet, it’s much more important to keep the glue off the panels.
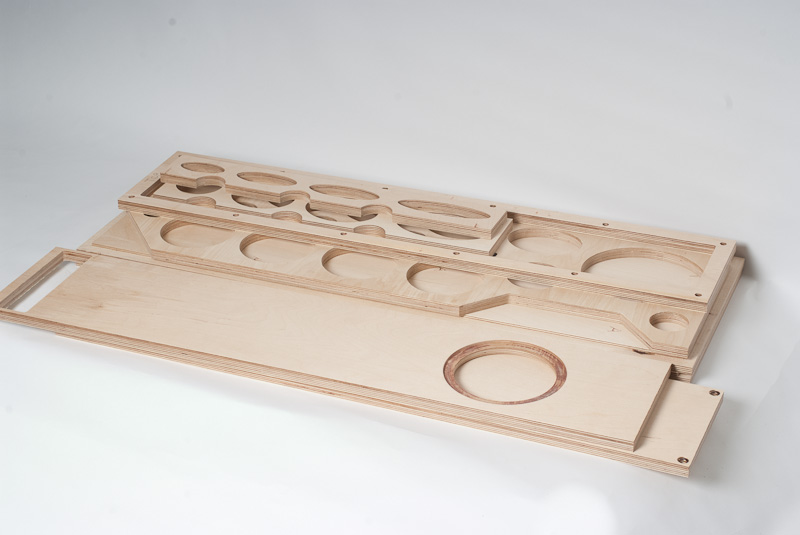
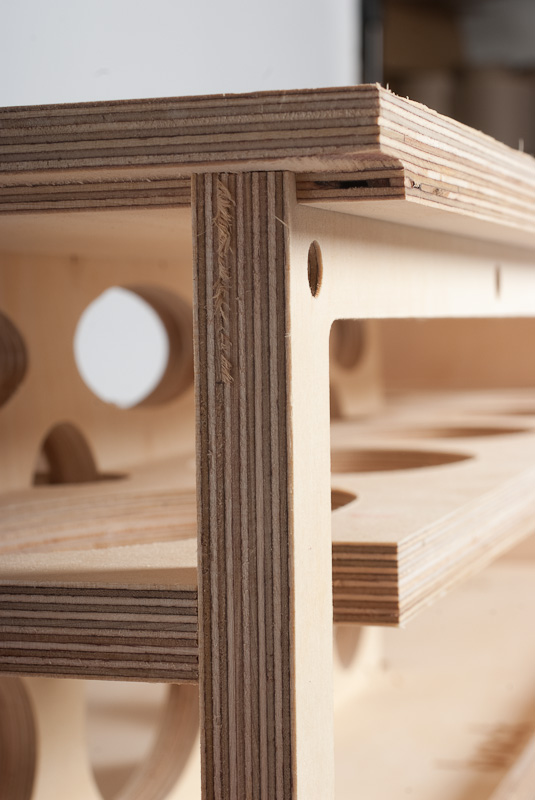
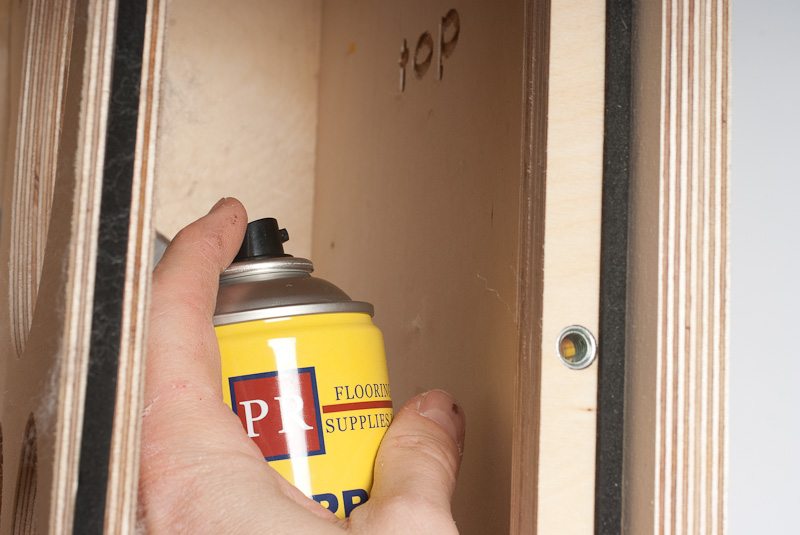
The first job you will need to do is screw the inserts into the frame provided, you’ll need an allen key to perform this. Turn the insert until the head is just below the surface of the ply wood.
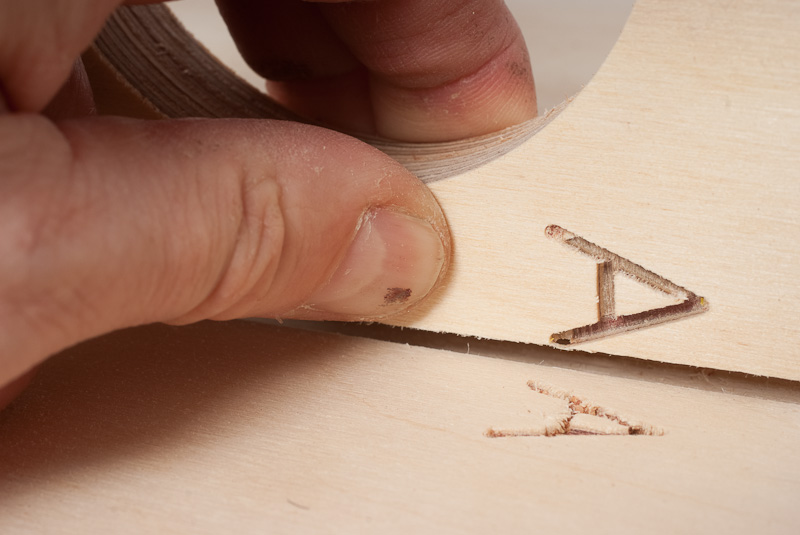
Place the rebated side panel marked ‘A’ onto the work surface.

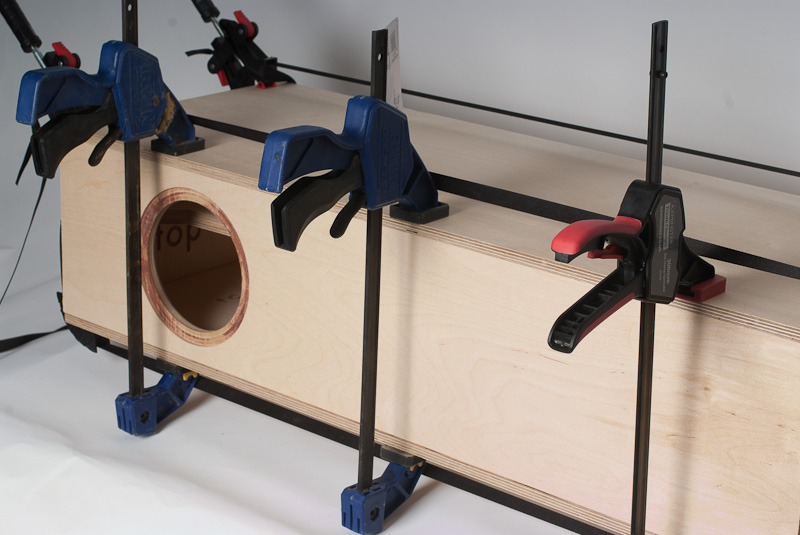
You will now need to locate your strap clamps.
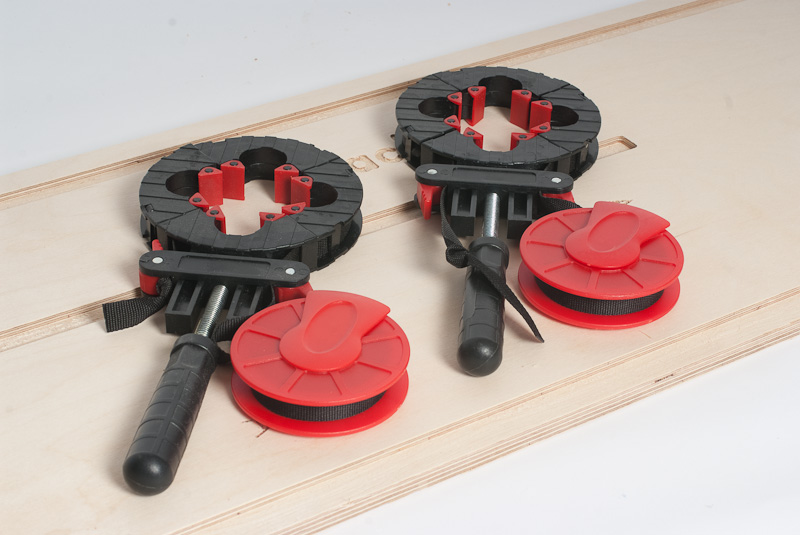
These will need to be laid out so that two of the corner pieces of one strap are under the top and bottom edges at the front and the other strap so that the corner pieces are under top and bottom at the back. Make sure that the tightening handles are free and are both at the top, also this is a good time to make sure that the tension is completely wound off so that you have the maximum travel later on for clamping.
Add glue to the slot marked rear, and push the frame into this slot with the allen key side of the insert facing the back of the panel, the frame is 6mm longer either end than the rebate, make sure you have an equal amount sticking out each end.
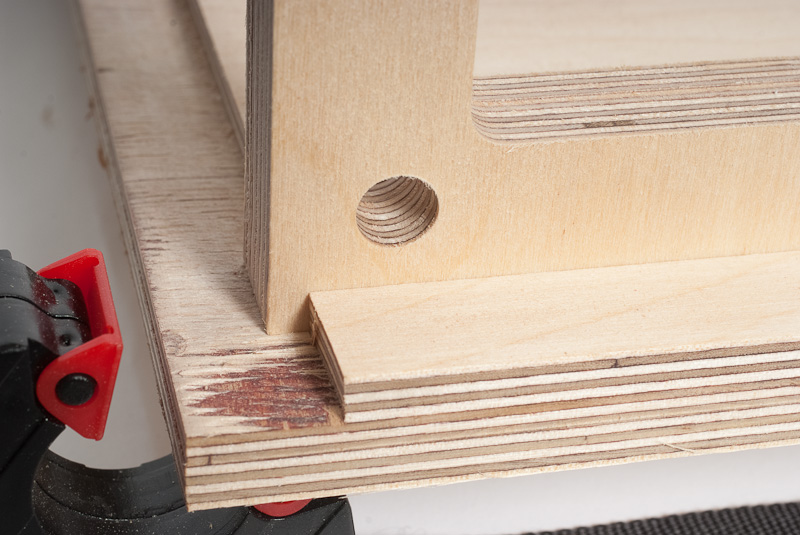
Next place the top panel in it’s rebate and push the frame all the way into it and then make sure that the pair of them are pushed all the way into the rebate so that there is no gap.
At this point use a small clamp, this is only to hold the pieces in place while you do the next steps, no real clamping force is needed so just a grip like pictured is all that is needed.
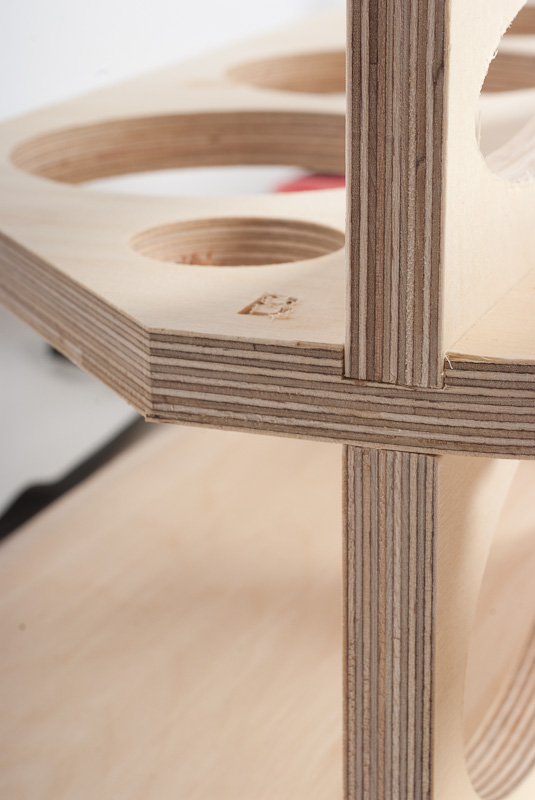
After this the larger of the 2 side braces marked ‘A’ needs to go into the slot also marked ‘A’, the two ‘A’ marks will line up.
The brace needs to stick out 6mm like the frame as they will both sit in the rebate of the bottom piece so that once dried the whole box will be a braced rigid box.

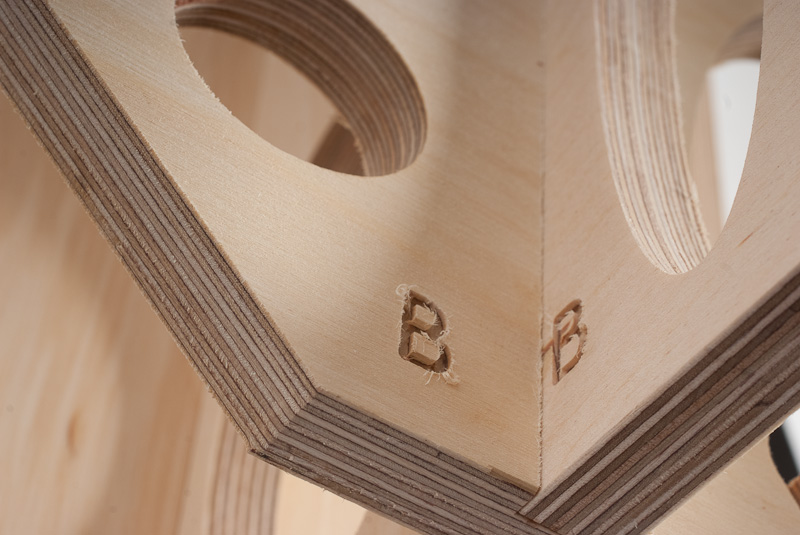
Once the ‘A’ brace is in place the next piece is the main brace that braces the front panel to the other panels. You will need to put glue on the top edge of the ‘A’ brace and into the rebate on the top panel, once you have done that and holding the brace at an angle push the brace into the top panel and lower it onto the ‘A’ brace. The brace goes in so that the rebate in it and the ‘B’ lettering is facing upward and the cut-out for the driver magnet is facing toward the front of the cabinet.

Next up is the ‘B’ Brace, first add glue into the rebate on the main brace and then push the ‘B’ brace into it so that the bottom of the panels line up together.
Next locate the bottom piece, you will need to add glue to the rebate that it slots into on the ‘A’ side panel and then add glue to the rebate in the panel itself, you’ll need to work reasonably fast as the glue will drip. place the edge into the side panel rebate and lift the panel so that the rebates marry up with the end of the braces, again use a clamp or grip to hold the panel in place.
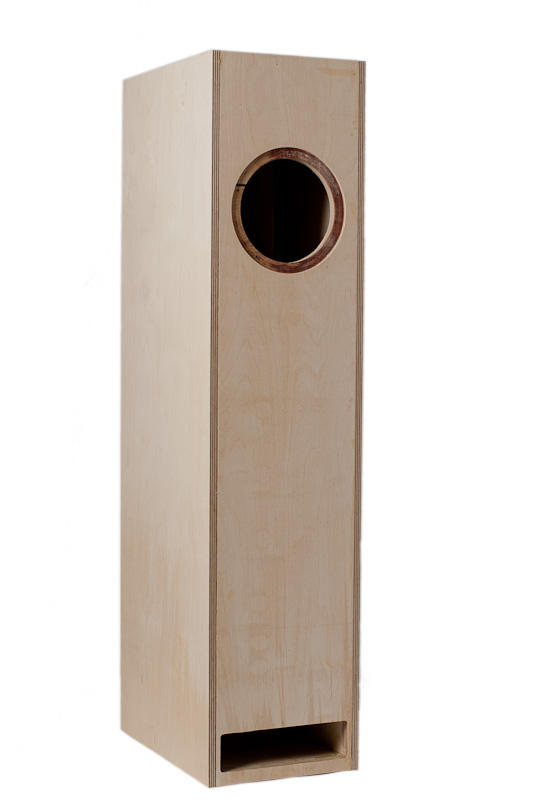
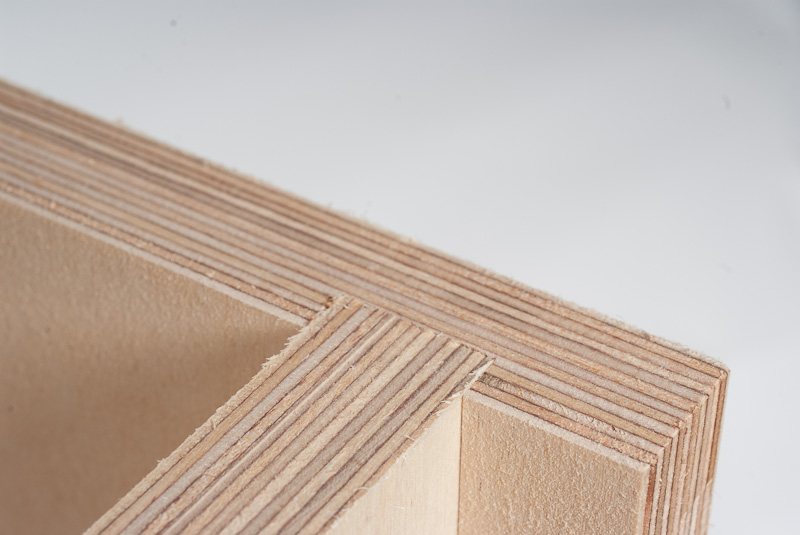
This next step starts to make the cabinet look like a speaker box!

You will need to add glue onto the end of all of the panels you can see, the frame, the end panels and the ‘B’ brace. Hold the side panel, rebate side down, and lower the top end so that rebate lines up with the top panel. Once they are in line lower the rest of the panel, you’ll likely have to reach inside to make sure that the ‘B’ brace lines up with it’s rebate in the side. once you have all the braces lined up with the rebates slight downward pressure will press the panel rebates home onto the braces and top/bottom panels. I have left the bottom panel out of these images so you can better see the braces in the rebates.
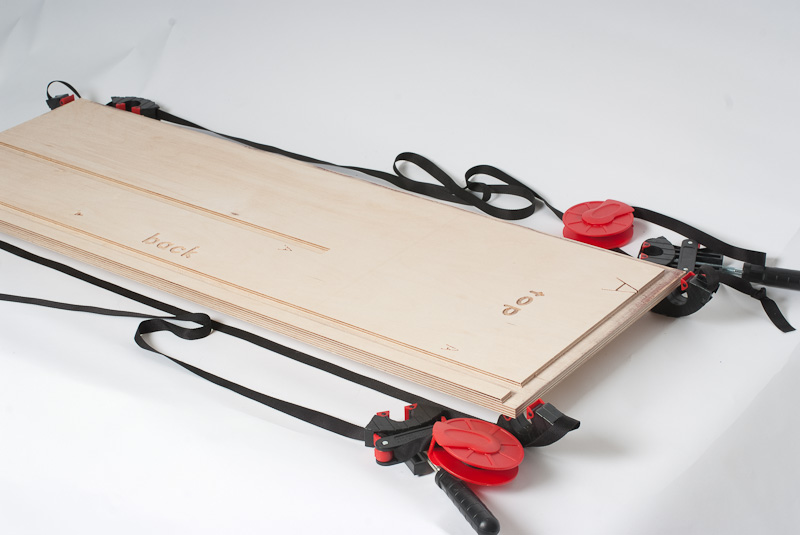
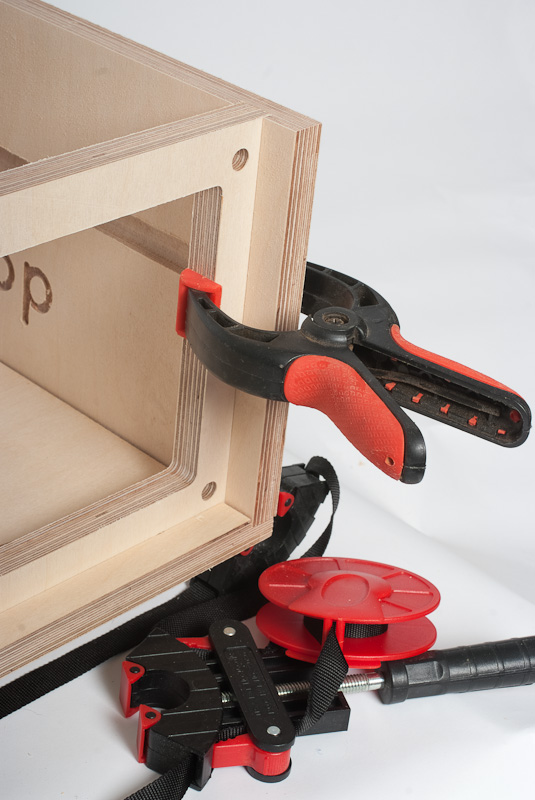
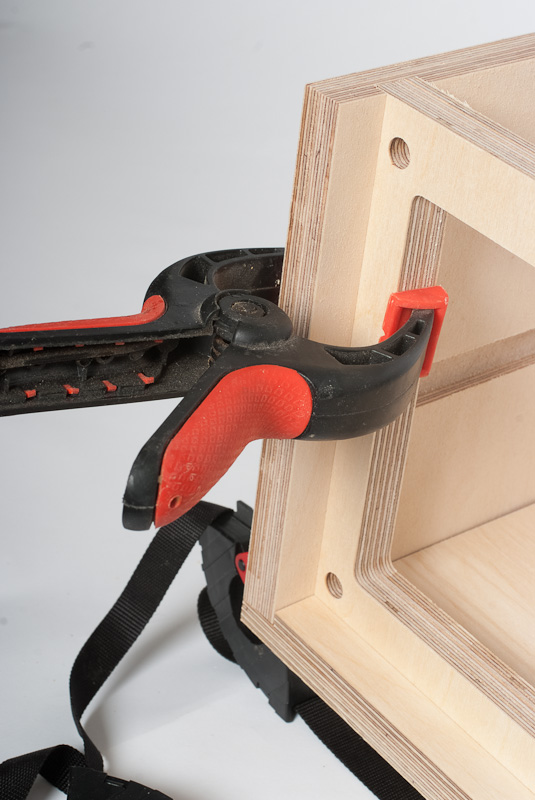
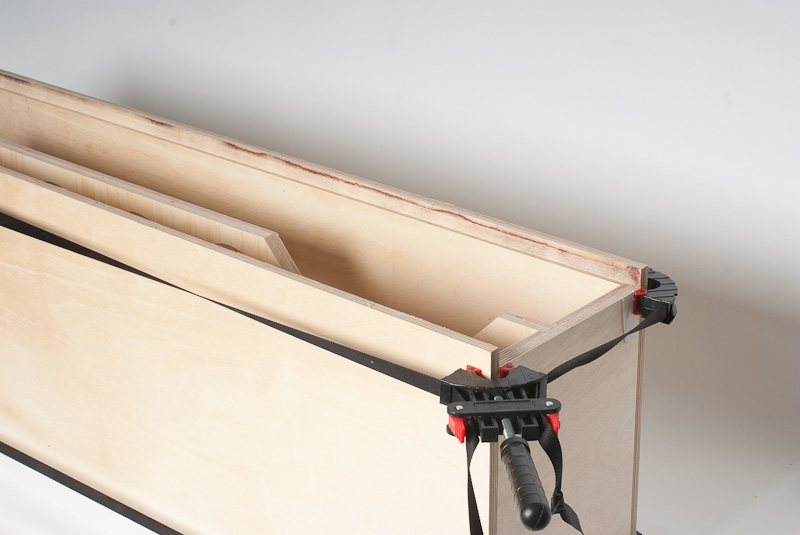
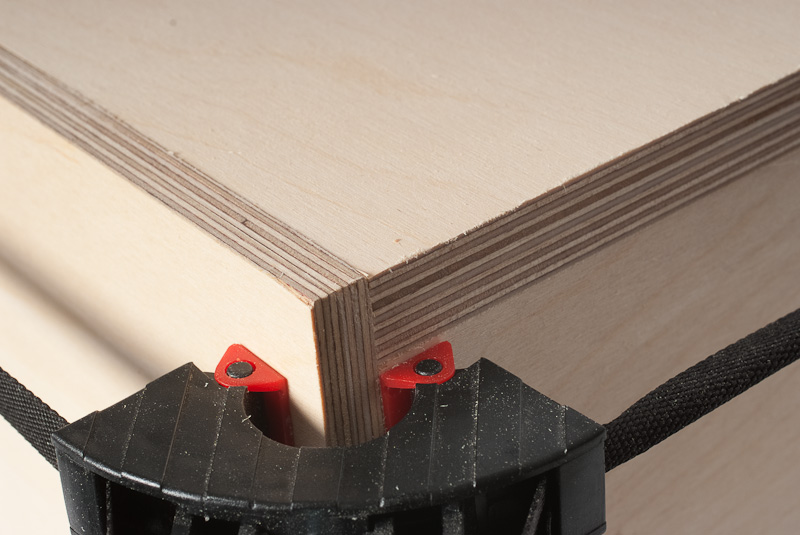
The next thing you need to do is move the straps around the cabinet so that you can place the corner pieces around the top most corners, you need to make sure that the pressure pads of the clamps are on the sides and that the corner pieces are pretty square, once you are happy start to tighten the straps a little, not completely, at this point you just need all the panels to hold together.

Now you are going to use the back panel to ensure that the construction is square, the rear panel is slightly smaller than the aperture so should go in without to much bother. Before you put the panel in place you must make sure that that you have scrupulously cleaned the glue that may have squeezed out of the rebates, you don’t want the panel to stick in the cabinet!
Keeping the back panel in place carefully turn the whole cabinet onto it’s back so that the front is facing upward.
Now you are going to add the front panel, you will need to orient it so that the driver hole is toward the top so that it lines up with the cut out in the brace, it might sound obvious but this is the only bit you can fit together wrongly so make sure you are getting it right! You need to add glue to the rebates and the ends of the top and bottom panels and the edge of the central brace then push the front baffle into place.

Make sure that the baffle is lined up with the end of the side panels on either corner, this is very important, you’ll be doing a lot of sanding or filling if you don’t line these up correctly.
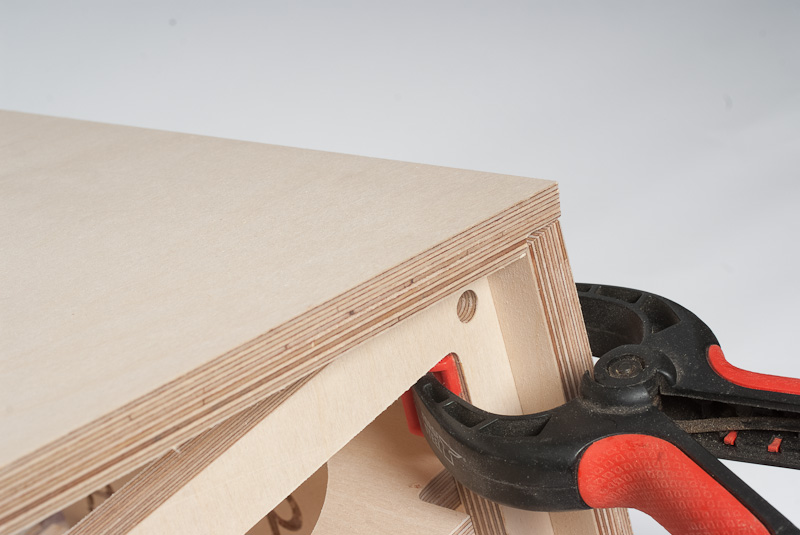
You’ll need to close up the gaps now, turn the handles on the strap clamps so that they are as tight as possible then use your clamps along the edges to pull the side panels tight to the baffle. once you have done that you can remove the rear panel wipe up all of the glue that has dripped and squeezed out, both out side and inside the cabinet, take as much time as you need to get this done, time spent now will save a lot of sanding later!! Leave the cabinet to thoroughly dry after this before you remove the clamps and straps, this should be about an hour, if you need the clamps for the second cabinet you can remove them after this time but do not stress the cabinet for 24 hours.

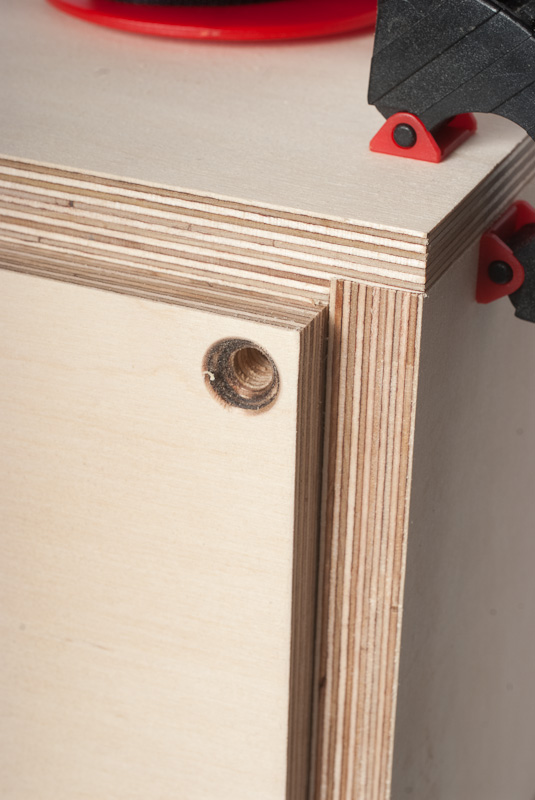
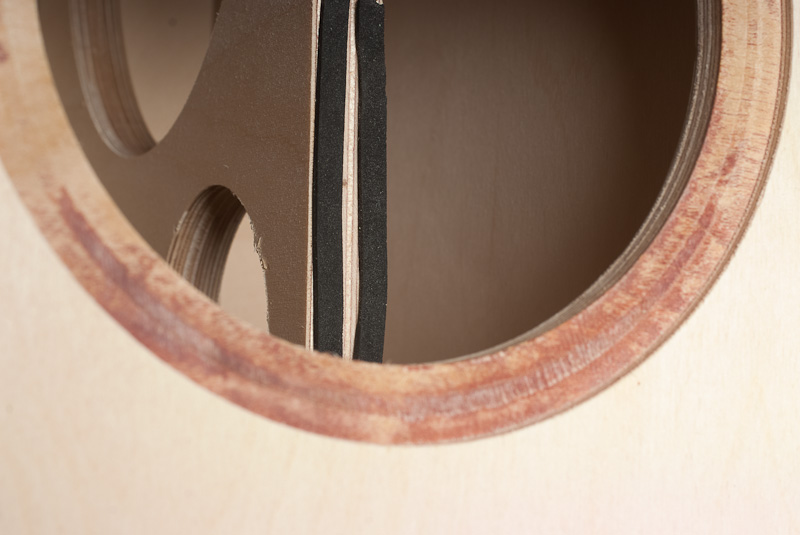
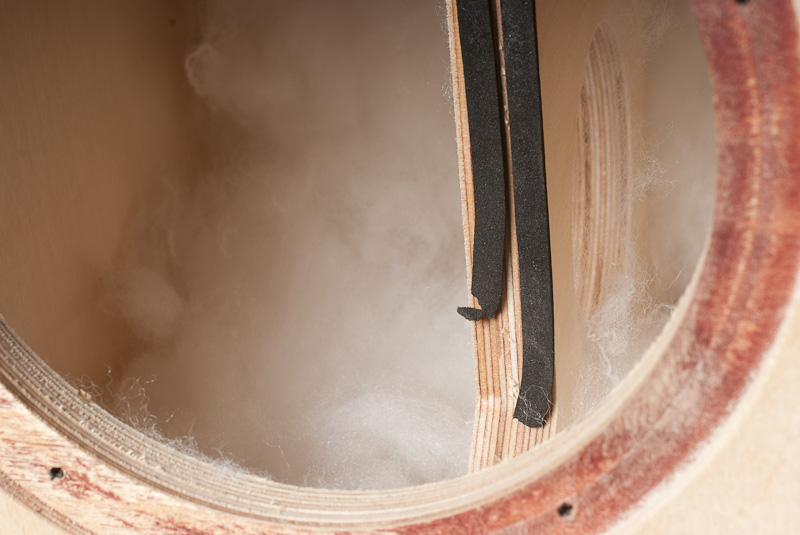
Once the cabinet is dry you can proceed to the next steps. Take the neoprene strip, you need to run this round the outside of the frame between the edges of the cabinet and the inserts, be careful to make sure that there are no gaps where the joins are, we don’t want any air leaks. you will also need to add 2 strips side by side on the part of the main brace you can see behind the driver opening, this effectively braces the driver and reduces it’s interaction with the cabinet.

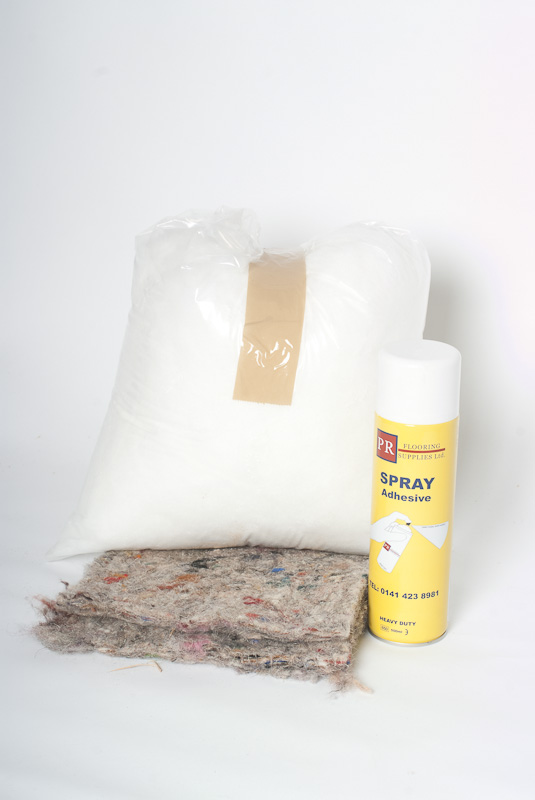
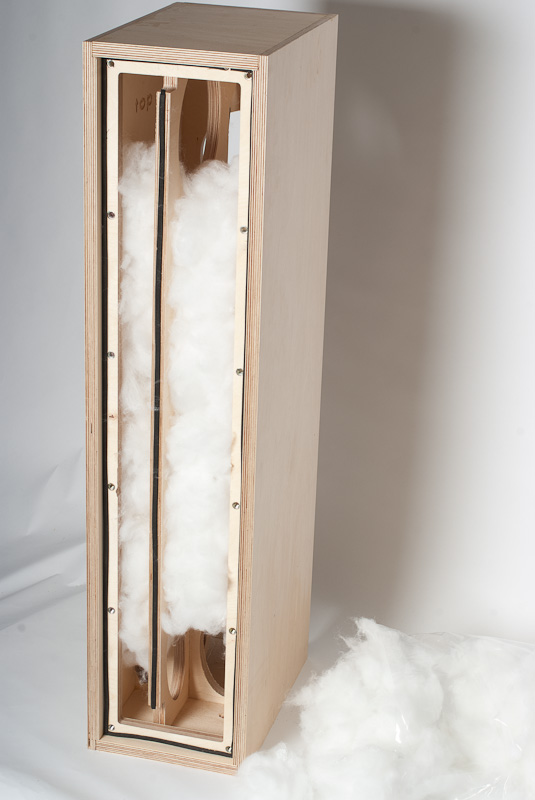
Next you’ll need to add the damping to the speaker, if you purchased the damping kit from us you will have 2 bags of 500g acoustic stuffing, felt and spray glue as pictured, if you didn’t purchase the damping kit you will need to source your own or come back to the website to purchase some.
Ignore the felt and the glue for the time being, take one of the bags or acoustic stuffing (500g) you will need to stuff one of the cabinets with each bag. We recommend starting with about half of the stuffing as a staring point and once you have got used to the sound of the speaker in your room or have had the opportunity to try different positions and measurement you can try increasing or decreasing the amount of stuffing to tune the bass response to suit your preferences.
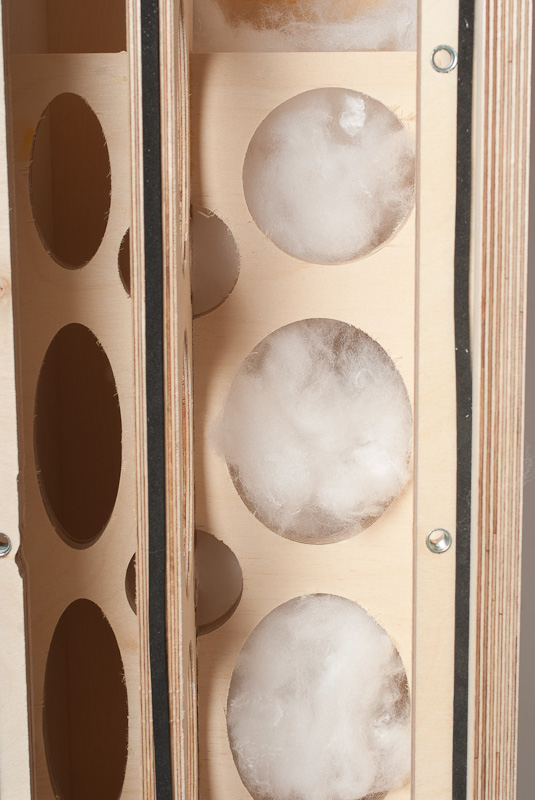
You will need to tease the stuffing through the holes which will aid holding it in place, fill the cavity of the box but leave the area directly behind the driver free of stuffing or else you may cause dynamic compression of the driver, it is fine to have it toward the rear of the box behind the driver though. You will probably want to experiment with how far down you will need the stuffing but the image below is a good starting point. Once you’ve done this you can add the connectors to the back panel and connect up your choice of cable. Screw the back panel in using the supplied bolts, you can put this in either with the connectors nearer the top or the bottom depending on your preference. If your preference is to have the driver nearer the bottom it is my recommendation that you thread the cable through the holes in the braces to relieve the strain on the driver connectors. Lastly connect the Mark Audio Pluvia 11 full range drivers and screw it in to the cabinet using the supplied cap head screws, the drivers shouldn’t be tightened down to hard, just nipped up, you don’t want to distort the frame.
Once you have got the stuffing tuned to your listening environment it’s time to experiment with damping the cabinet walls with the felt. Dr Scott Lindgren the designer doesn’t recommend damping the
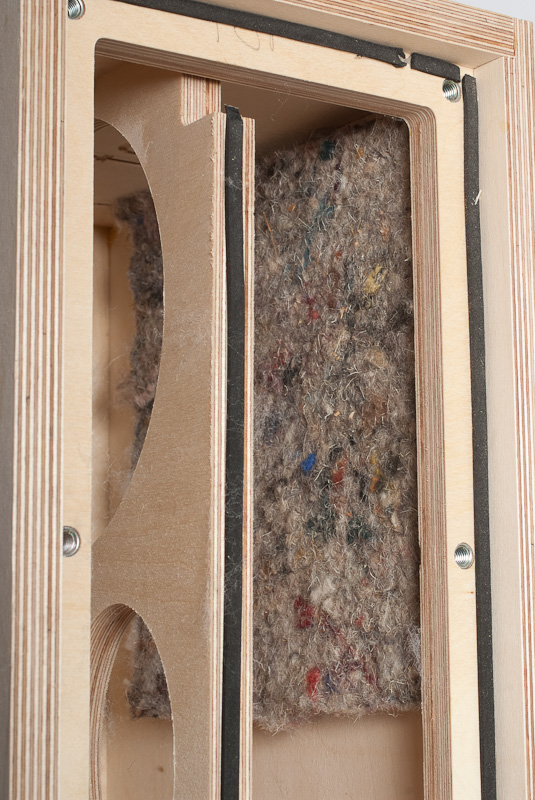
cabinet walls in this design at all but the felt is included in the kit so that you can tune to taste. You are doing two things when you use this felt, firstly you are reducing the reflections of energy in the cabinet area directly behind the driver and also changing the frequency and Q at which the side panels resonate.
I personally like to
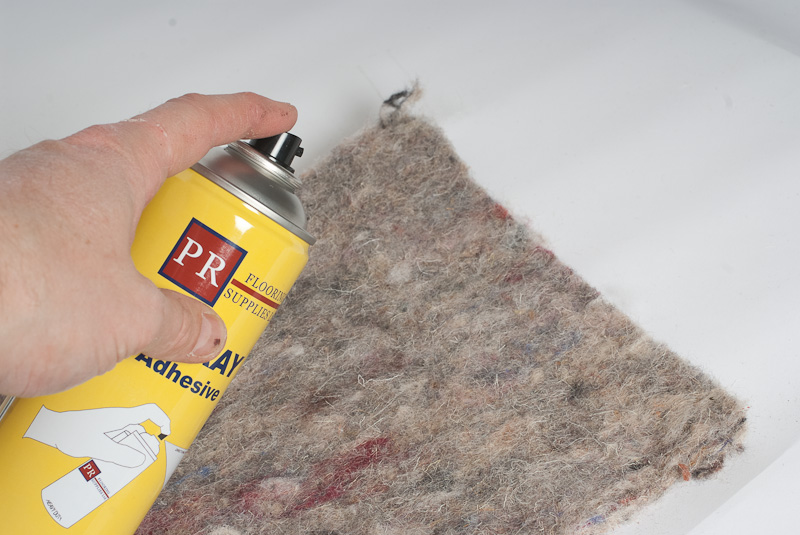
use a bit on the side walls just adjacent to the drivers, this mainly effects reflections, before you glue it in its a good idea try stapling it into place temporarily while you asses the difference, once you are happy with your decision take the spray glue provided, place the felt on a surface you don’t mind ruining like newspaper in a well ventilated area and spray the back side liberally,
you will also need to spray the panel to which you want to affix it, let the glue go tacky before you bring the surfaces together, it is a contact adhesive so once you put it in place you can’t adjust it so make sure you are getting it right!!
The last job is to add the spikes to the bottom of the speakers using the supplied threaded inserts.
Take the time to run the drivers in and sit back and enjoy listening to your new speakers, If you liked them please feel free to tell me, I love seeing photos of our speakers in their new homes.
If you want your speakers veneering or would like a go at doing it yourself we can supply veneer and
veneering services, just get in touch.
Stefan
Stefan,
It would be great to see the overall dimensions of the speaker kits up front in the product description.
Is it just the two kits, FHXL and P11, that you have available for sale at present?
Regards
Ifor
Hi Ifor,
Point noted, I’ll get them added when I do the next round of updates later this week. Yes just those two speaker kits at the moment but more will come soon. If you want something in particular please ask we can make any custom speaker you require.
Thanks. I’m not ready yet, but could be sometime during 2017. Not needed, but fun to do. I’ll watch with interest.
One thing I might like is magnet, under veneer, mounting of grills. How to do it might be something I will need guidance with.
Well I’m always happy to do guidance even if you aren’t making a purchase from me. I like to spread some speaker love 🙂
We’ll be adding speaker grille kits in the future and magnets will definitely feature!!
Excellent. I’m definitely in when the time is right.
Nice to meet you Please tell me the detailed dimensions of Pencil BOX as a stone roll of Ishinomaki in Japan
Hi Toshi, I think something got lost in translation in your post. I think you are asking for a set of build plans for this speaker so that you can build your own version? I haven’t got a set of plans at the moment that are free for use but I may have those available in the future.
How close to the rear wall can the Pensils be positioned?
Hi Ifor,
Very close, the bass response is partly tailored by the wall proximity but also by the amount of stuffing that is used, but if you need to use it closer you’d use more stuffing. How close do you need it?
As close as possible, ideally up against the skirting board.
That’s fine, you may find that you need more stuffing that the average user to tame the bass a bit but that is the beauty of this kind of speaker, it’s really tuneable.
After using mark audio alpair drivers for a few years I decided to venture in to something other than a frugal horn.
I stumbled upon this kit and bought it!
I am deeply impressed by the frequency response of the Pluvia 11 drivers in the Pensil boxes. The low end bass is something I never had with the frugal horns so it’s fair to say that these speakers are a massive upgrade.
Thanks go to Stefan on this build because I didn’t just buy the kit, but I also asked Stefan to assemble and veneer in oak. I could t be happier!
Excellent drivers placed in an awesome enclosure. Very happy customer !!
Hey Anthony, many thanks for the glowing review of both the driver and the speaker build, I really appreciate it, as I’m sure do those looking at this speaker and wondering if it’s right for them.
If only there were available in North America! I’d be on it in a heartbeat.
Hi Daniel, Actually although the site doesn’t have shipping options to the states (mainly because it’s to complex) I do send quite a few kits out there, two of the kits I’m packing up today in fact are going to the states. If you want a shipping quote please feel free to drop me a line via the contact form and I’ll happily oblige. Thanks for looking. Stefan
Hi,I’d be very interested in your full range drivers-I use Lowther dx3s,in a reflex enclosure- I love the sound of the Lowthers but they break up easily at above moderate volume. Would your drivers go as loud before break up, or do you have any larger full range drivers in the pipeline?
Many thanks.
Richard
Hi Richard,
Yes these drivers have a much higher potential to louder without the large breakup modes associated with the old tech employed in Lowther type drivers. You are best emailing me with questions at admin@kjfaudio.co.uk